Key takeaways
- Toe rail routing: Drill a series of 3/8-inch holes through the back of each upper cabinet, feed low-voltage wire down behind the lower cabinets, and exit through the toe kick near the outlet or switch location. This avoids any drywall work and is reversible. It takes longer per cabinet but requires no patching or repainting.
- Wall routing: Cut a small access hole behind where the cabinet will hang, run wire down inside the wall cavity to a new switch box, then patch and repaint. This gives you a true wall switch with no visible cord or inline dimmer box, but it’s a bigger job, especially on an exterior wall with insulation, and it’s not something to take on if the wall has existing electrical you haven’t mapped.
What's inside
Installing under cabinet LED lights takes about 2-4 hours for a standard kitchen and comes down to three decisions: plug-in versus hardwired power, where exactly to mount the strip so you see light instead of hardware, and how to size the driver so it doesn’t overheat or dim prematurely. Here’s the full process with the measurements that actually matter.
As an Amazon Associate we earn from qualifying purchases at no extra cost to you.



Plug-In vs. Hardwired: Which One Fits Your Kitchen
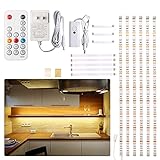
Plug-in kits run on a 12V or 24V puck-style transformer that plugs into a wall outlet, usually hidden inside a nearby cabinet or behind the toe kick. Hardwired systems tie into a dedicated switched circuit, either an existing outlet converted to a switch loop or a new line run by an electrician. The right choice depends on your situation, not just your budget.
| Situation | Recommended setup | Why |
|---|---|---|
| Renters or short-term owners | Plug-in, battery-free LED strip kit | No permanent wiring changes, fully removable at move-out |
| Full kitchen remodel in progress | Hardwired, in-wall switch | Walls are already open, cheapest time to run wire |
| Existing kitchen, no remodel planned | Plug-in with inline dimmer switch | Avoids cutting finished drywall or backsplash tile |
| Want wall-switch control, no visible cord | Hardwired through toe rail routing | Hides wire without opening drywall |
Step 1: Measure and Mark Mounting Position
Mount the LED strip 1.5 to 2 inches back from the front face of the cabinet. This single measurement determines whether the install looks finished or amateur. Mounted flush with the cabinet edge, you see the individual diodes as a dotted line on the backsplash. Set back 1.5-2 inches, the light bounces off the counter and wall and you only see the glow, not the fixture.
Measure the depth of your wall cabinets first. Standard upper cabinets run 12-13 inches deep, which leaves plenty of room for the setback. On shallower 10-inch cabinets, stay closer to 1.5 inches so the light still reaches the front edge of the counter.
Spacing from the Ends
Stop each light bar 2 to 3 inches short of the cabinet’s outer edges. This keeps the diodes from showing past the cabinet face when viewed from the side, and it prevents hot spots of brightness right at the corner where two runs might overlap. For a 36-inch-wide cabinet section, that means your usable strip length is roughly 30-32 inches, not the full 36.
At inside corners, leave a small gap of about 1 inch between the two strip ends rather than butting them together or overlapping. Overlapped diodes create a visible bright line on the counter below.
Step 2: Size the Driver (Transformer)
Add up the wattage of every LED strip run on that circuit, then size the driver to 120% of that total. The headroom matters for two reasons: drivers run cooler and last longer when they’re not maxed out, and it leaves room to add a strip later without buying a second power supply.
| Total LED strip wattage | Driver size needed (20% headroom) | Typical use case |
|---|---|---|
| 20W | 24W driver | One wall of upper cabinets, single run |
| 36W | 45W driver (nearest standard size) | L-shaped kitchen, two cabinet runs |
| 60W | 72W driver (or two 36-40W drivers) | Full kitchen perimeter lighting |
| 80W+ | Split into two drivers, each sized separately | Large kitchen or open-concept layout |
For most residential installs, a 24V system is easier to work with than 12V because the lower current means thinner wire runs can carry the same power without voltage drop. If a single run is longer than about 16 feet, 24V also reduces the visible dimming you’d otherwise get at the far end of a 12V strip.
Step 3: Route the Wire
You have two realistic paths for getting wire from the strip down to the power source: through the cabinet toe rail, or through the wall.
- Toe rail routing: Drill a series of 3/8-inch holes through the back of each upper cabinet, feed low-voltage wire down behind the lower cabinets, and exit through the toe kick near the outlet or switch location. This avoids any drywall work and is reversible. It takes longer per cabinet but requires no patching or repainting.
- Wall routing: Cut a small access hole behind where the cabinet will hang, run wire down inside the wall cavity to a new switch box, then patch and repaint. This gives you a true wall switch with no visible cord or inline dimmer box, but it’s a bigger job, especially on an exterior wall with insulation, and it’s not something to take on if the wall has existing electrical you haven’t mapped.
If you’re converting a switch loop for a hardwired install and you’re not confident reading the existing wiring at the switch box, that’s the point to bring in a licensed electrician rather than guess. Miswiring a switch loop can leave a hot wire where you don’t expect it.
Step 4: Mount and Connect
Clean the mounting surface with isopropyl alcohol before applying any adhesive-backed strip or clip channel. Grease and dust from the cabinet underside are the top reason adhesive strips fall within the first year. For kitchens, an aluminum mounting channel with a diffuser lens outperforms bare adhesive strips long-term, since it also helps dissipate heat and keeps the diode line from showing even if your setback is slightly off.
Connect runs in parallel, not in series, when wiring multiple cabinet sections to one driver. Series wiring causes voltage drop that makes the far end of the run visibly dimmer, especially noticeable on runs longer than 10 feet.
Testing Before Final Fastening
Power on the full run before you commit to final screws or adhesive placement. Check for:
- Even brightness across every section, with no visible dimming at the far end of a run
- No flicker when a dimmer switch is set to its lowest level
- Driver case temperature after 20 minutes of operation, it should be warm, not hot to the touch
If the driver feels hot or the far end of a long run is noticeably dimmer, that’s a sign the driver is undersized or the run exceeds the recommended length for the gauge of wire used, and it’s worth fixing before the strip is permanently mounted.
Common Mistakes That Show Up Later
| Mistake | What happens | Fix |
|---|---|---|
| Strip mounted flush with cabinet edge | Visible dotted light line on backsplash | Reposition 1.5-2 in. back from face |
| Driver sized at exactly 100% of load | Shortened driver lifespan, premature dimming | Rebuild with 20% headroom |
| Strips wired in series across cabinets | Noticeable dimming at far end | Rewire in parallel to the driver |
| No access point left for driver | Driver fails, requires cutting into cabinet to replace | Mount driver inside a cabinet with removable panel access |
FAQ
Can I use a 12V strip with a 24V driver?
No. Running a 12V-rated strip on 24V will overdrive the diodes and burn them out quickly, often within hours. Match the strip’s rated voltage to the driver exactly.
Do I need an electrician for a plug-in kit?
No, plug-in kits with a wall-wart style transformer are designed for DIY installation and don’t involve line voltage work. An electrician is only necessary for hardwired installs tied into your home’s circuit.
How long do under cabinet LED strips typically last?
Quality LED strips rated for continuous use typically run 30,000-50,000 hours before noticeable dimming, which translates to 15-20+ years at average kitchen usage of 4-6 hours a day.