Key takeaways
- Measure the flat mounting area. Many adhesive products need 2–4 inches of uninterrupted surface behind the base.
- Check the tile finish. Matte, heavily textured, cracked, or porous tile can prevent a reliable bond.
- Keep adhesive pads off grout lines. Grout is uneven and can crumble or collect moisture.
- Clean with isopropyl alcohol where the instructions allow; avoid oily bathroom sprays and do not apply to a wet wall.
- Press firmly for the specified time and allow the full cure period, often 12–24 hours, before loading.
- Leave space below a shelf for fingers. A 2-inch gap is usually more usable than mounting a shelf directly above the sink.
The best small bathroom storage ideas for renters are removable adhesive shelves for light items, over-door organizers for everyday supplies, and tension-mounted systems for the heaviest load—chosen by the wall surface, available clearance, and the organizer’s stated weight limit.
Our top picks


As an Amazon Associate we earn from qualifying purchases at no extra cost to you.
Choose by situation before you buy
| Your situation | Best choice | Useful capacity | Main caution |
|---|---|---|---|
| Very small apartment bathroom | Over-door pockets or a slim tension caddy | 8–20 lb total | Measure door swing and frame clearance |
| Smooth tile with no floor space | Adhesive corner shelves or hooks | 2–10 lb per item, depending on hardware | Do not use on grout, textured tile, or dusty surfaces |
| Kids, pets, or frequent restocking | Tension pole with locking shelves | 15–40 lb total, if evenly distributed | Secure the pole; avoid sharp protruding corners |
| Heavy bottles and spare towels | Floor-to-ceiling tension unit or freestanding etagere | 20–50 lb total | Check ceiling height and protect the floor finish |
| Drywall that cannot be drilled | Over-door storage or a freestanding narrow cabinet | Varies by design | Adhesive may pull paint or paper from drywall |
Weight limits are not interchangeable. A hook rated for 5 lb may hold a towel but fail with a wet robe, while a shelf rated for 10 lb may require several adhesive strips and a perfectly smooth surface. Treat the published limit as a maximum, not a target: staying at 50–75% of that number gives a better margin for damp conditions, repeated use, and uneven loading.
Adhesive storage: best for light, frequently used items
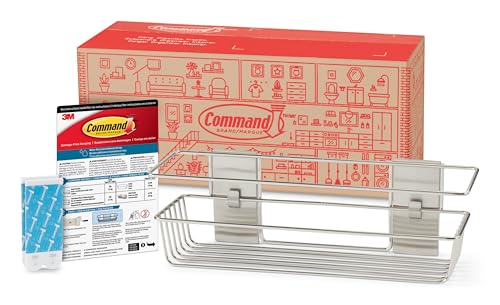
Adhesive hooks, soap dishes, toothbrush holders, and narrow shelves use vertical wall space without holes. They work best on clean, glossy ceramic or porcelain tile, glass, sealed stone, and some painted surfaces. Use them for hand towels, loofahs, toilet-paper backup, grooming tools, or bottles under the stated limit.
What to check before sticking anything up
- Measure the flat mounting area. Many adhesive products need 2–4 inches of uninterrupted surface behind the base.
- Check the tile finish. Matte, heavily textured, cracked, or porous tile can prevent a reliable bond.
- Keep adhesive pads off grout lines. Grout is uneven and can crumble or collect moisture.
- Clean with isopropyl alcohol where the instructions allow; avoid oily bathroom sprays and do not apply to a wet wall.
- Press firmly for the specified time and allow the full cure period, often 12–24 hours, before loading.
- Leave space below a shelf for fingers. A 2-inch gap is usually more usable than mounting a shelf directly above the sink.
Adhesive is a poor choice for a glass bottle collection, a loaded medicine cabinet, or anything that could injure someone if it falls. A practical renter-friendly arrangement is one adhesive hook for a towel, one small holder for toothbrushes, and a separate tension or over-door unit for bottles and reserve supplies.
How to remove adhesive without damaging the wall
Never pull a bonded pad straight toward yourself. Remove the contents, support the hook or shelf, and follow the product’s removal method. For stretch-release strips, pull the tab slowly straight down and parallel to the wall while keeping steady tension. For adhesive plates without a pull tab, warm the pad gently with a hair dryer on low, then work dental floss or thin plastic behind the plate rather than using a knife or screwdriver.
On painted drywall, removal can still lift paint or the paper facing, especially if the paint is old, damp, or poorly bonded. Test an inconspicuous spot first and photograph the wall before installation. Do not use heat on vinyl wallcovering, caulk, or plastic fixtures without checking the material’s care instructions.
Over-door organizers: the fastest way to gain storage
An over-door rack turns the back of a bathroom door into a cabinet. Choose fabric-pocket models for light items such as cosmetics, cleaning cloths, and unopened toiletries; choose metal racks with welded baskets for heavier bottles and towels. Over-door designs are especially useful for DIY bathroom storage ideas for small spaces because they use a surface that otherwise remains empty.
Measure three things before buying:
- Door thickness: commonly around 1⅜–1¾ inches, but older or unusual doors may differ.
- Top clearance: allow at least ¼ inch between the hanger and the frame, preferably more if the door is tight.
- Back clearance: allow 3–6 inches for baskets, plus enough room for the door handle and nearby wall.
Also check whether the rack interferes with the door’s full swing. A loaded organizer can make a hollow-core door feel heavy, so keep the heaviest items low and close to the hinges. Fabric pockets are quiet and lightweight but can sag, retain moisture, and wear first at the seams. Powder-coated metal lasts longer around splashes, but it can scratch the door unless its hooks have rubber or felt protection.
Most over-door products list a total capacity rather than a safe capacity for each pocket. If the total rating is 20 lb across ten pockets, do not place 5 lb in one pocket simply because the other nine are empty. Distribute the load and keep wet towels off fabric unless it is specifically washable and mildew-resistant.
Tension-mounted organizers: the strongest no-drill option
A tension pole caddy braces between the floor and ceiling, or between two opposing walls, so it does not rely on adhesive. It is usually the better choice for shampoo, conditioner, body wash, spare toilet paper, and family-size supplies. Look for adjustable feet, non-slip end caps, rust-resistant aluminum or coated steel, and shelves with drainage holes.
Measure the finished floor-to-ceiling height at several points. A bathroom ceiling may vary enough that a pole rated for 96 inches will not fit beside a sloped ceiling or a thick crown molding. Leave room to tighten the pole without forcing it against fragile tile. A tension system that is too loose can slide; one that is over-tightened can mark drywall or crack a tile edge.
Capacity depends on the pole design, shelf spacing, and how evenly weight is distributed. A realistic household setup may hold 15–25 lb comfortably, while heavy-duty systems can list 30–40 lb or more. Put the heaviest bottles on the lowest shelf, keep each shelf below its individual limit, and retighten the pole after several days. Moisture and soap residue can make feet slippery, so wipe both contact points periodically.
When tension storage is not suitable
A tension pole is not ideal in a shower with a weak or uneven ceiling, on a slick tub ledge, or where children may climb or pull on it. It also consumes some floor or corner space. Keep at least 2 inches of clearance from the toilet, and leave roughly 24–30 inches of comfortable passage in front of the vanity or shower entrance. In a particularly narrow bathroom, an over-door rack may provide more usable circulation.
Combine systems instead of overloading one wall
The most effective small bathroom storage plan usually assigns each category to the right support:
- Adhesive hook: one towel, bath brush, hair tool, or robe under the listed limit.
- Over-door pockets: small, light items that need visual sorting.
- Metal over-door baskets: folded towels and bottles, provided the door and hinges can handle the load.
- Tension shelves: concentrated weight and tall bottles.
- Freestanding slim cart: backup supplies where a 6–10-inch-wide unit can fit without narrowing the walkway.
For a small apartment, a 6-inch-wide rolling cart beside the vanity can hold toilet paper and cleaning supplies, while adhesive hooks handle towels and a door rack handles cosmetics. For a shared bathroom, use labeled baskets on a tension unit rather than mounting many individual hooks. For children, choose rounded metal or plastic edges and keep medicines, razors, and cleaning chemicals in a locked or inaccessible location.
Rental-safe installation and move-out checklist
- Read the weight, surface, cure-time, and removal instructions before opening the package.
- Measure doors, ceilings, corners, and walking clearances; do not rely on a product’s external dimensions alone.
- Clean and dry mounting surfaces, then mark positions with removable painter’s tape.
- Load gradually after the cure period, starting at half the stated capacity.
- Inspect adhesive edges, tension feet, door hooks, and rust once a month.
- At move-out, empty every organizer, remove it slowly, clean residue with a surface-safe method, and photograph the finished wall.
These precautions make no-drill storage genuinely deposit-conscious rather than merely hole-free. The right choice is the lightest system that safely holds the items you own: adhesive for small accessories, over-door storage for accessible overflow, and tension-mounted shelving when bottles and towels need real capacity.