Key takeaways
- Surface requirement: The package should specify whether it accepts painted drywall, sealed wood, laminate, glass, tile, or another material.
- Temperature range: Find the stated operating or application temperature, not just the phrase “heat resistant.”
- Moisture guidance: “Water resistant” does not necessarily mean waterproof at seams or edges.
- Removal instructions: Renters should favor products designed for removable installation and test a hidden area first.
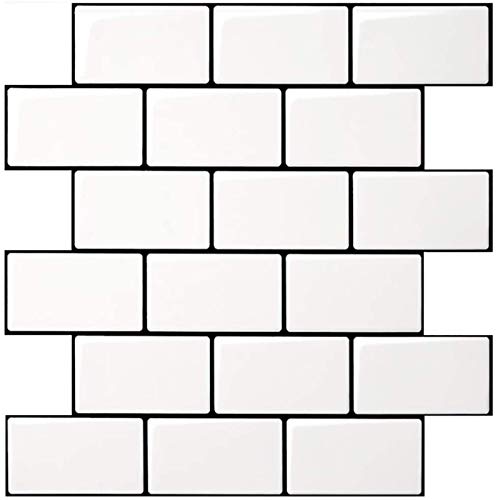
The best subway tile peel and stick backsplash is the one whose thickness, adhesive, heat rating, and surface compatibility match your kitchen—not simply the one with the most realistic tile print.
Our top picks


As an Amazon Associate we earn from qualifying purchases at no extra cost to you. Ratings are shown as listed on Amazon.
Start by deciding whether peel-and-stick is suitable
Peel-and-stick backsplash panels are usually made from PVC, vinyl, resin, gel, foam composite, or a thin metal-faced material rather than fired ceramic. They are attractive when you want a fast cosmetic update, a reversible improvement in a rental, or a low-mess project. They are less suitable where the backsplash receives constant steam, standing water, scrubbing, or direct heat.
For a low-use kitchenette, dry bar, laundry room, powder room, or wall behind a dining-area counter, peel-and-stick can be practical. For the wall immediately behind a gas range or a sink that is regularly splashed, ceramic tile, porcelain tile, or a properly installed sheet backsplash is usually the more durable choice.
Compare the construction before comparing the pattern
Two products can both be labeled “subway tile” while performing very differently. Check the product specification for thickness, material, adhesive type, cleaning instructions, and the maximum recommended temperature.
| Backsplash type | Typical thickness | Best use | Main limitation |
|---|---|---|---|
| Printed vinyl sheet | About 1–2 mm | Low-cost decorative updates and smooth walls | Can show wall imperfections and may look less dimensional |
| Foam or composite 3D panel | About 3–5 mm | More visible “tile” depth and light renovation projects | Edges can collect grease; thicker panels may interfere with outlets |
| Resin or gel-look panel | About 3–6 mm | Decorative kitchen walls away from direct heat | Often more expensive and may not tolerate abrasive cleaning |
| Thin metal-faced panel | About 1–3 mm | Modern finishes and areas needing a firmer surface | Can scratch, dent, or conduct heat depending on construction |
| Ceramic or porcelain tile | About 6–10 mm, excluding adhesive | High-moisture and long-term installations | Requires mortar or tile adhesive, cutting, grout, and more preparation |
Thickness is not a quality score by itself. A thin panel may sit neatly around outlets and countertop trim, while a thicker panel can hide minor unevenness and create a more convincing tile profile. Measure the finished thickness before buying if the backsplash meets cabinet end panels, window trim, switch plates, or a range hood.
How to evaluate the adhesive
Adhesive strength depends on both the product and the wall. Look for a full-coverage adhesive layer rather than a few small adhesive dots. Panels with stronger adhesive generally hold better, but they are also harder to reposition and may damage paint or drywall during removal.
Check these four adhesive details
- Surface requirement: The package should specify whether it accepts painted drywall, sealed wood, laminate, glass, tile, or another material.
- Temperature range: Find the stated operating or application temperature, not just the phrase “heat resistant.”
- Moisture guidance: “Water resistant” does not necessarily mean waterproof at seams or edges.
- Removal instructions: Renters should favor products designed for removable installation and test a hidden area first.
Buy a sample or one small pack before covering the entire wall. Apply it to the actual surface, leave it for at least 48–72 hours, and inspect the corners and seams. A panel that adheres to a clean sample board may fail on a wall coated with grease, textured paint, silicone, dust, or old wallpaper adhesive.
Surface compatibility matters more than most buyers expect
The wall should be smooth, dry, clean, sound, and free of loose paint. Lightly textured walls can create air gaps that reduce contact. Heavily textured walls, brick, unfinished drywall, dusty plaster, and peeling paint are poor candidates unless they are repaired and sealed first.
Clean kitchen walls with a suitable degreaser, rinse away residue, and allow them to dry completely. Do not apply adhesive over fresh paint until the paint has cured according to its label; many interior paints need several days or longer before they are ready for a bonded covering. Remove silicone caulk from the bonding area because many adhesives will not stick reliably to it.
Existing ceramic tile can be acceptable if it is firmly attached, clean, and relatively flat. Deep grout lines may telegraph through a thin sheet. In that situation, fill and smooth the joints, or choose a thicker panel designed to bridge minor variation. Never cover loose or cracked tile without addressing the underlying problem.
Heat and moisture: define the safe zone
Peel-and-stick backsplash products should not be treated as a universal substitute for tile behind a cooking appliance. Many are intended for normal room temperatures and indirect kitchen heat, while others permit limited use near a range. The manufacturer’s temperature limit controls; do not infer suitability from a product photograph or a “kitchen safe” label.
As a practical screening rule, avoid placing peel-and-stick panels where they can touch cookware, receive an open flame, or sit directly in the hot exhaust path of a range. Leave the clearance specified by the manufacturer; if none is provided, choose a conventional heat-rated backsplash for the area directly behind or beside burners. A panel several inches from a cooktop may experience very different conditions from one behind a large pan.
For sinks, seal exposed perimeter edges only if the product instructions allow it. Sealant can improve splash protection but may make removal more difficult and can trap moisture if applied over a damp or contaminated surface.
Choose by situation, not by appearance alone
| Your situation | Most suitable choice | What to verify |
|---|---|---|
| Small apartment or rental | Thin removable panel with low-profile seams | Removal method, landlord rules, and whether paint may lift |
| Children, pets, or frequent cooking | Thicker, washable panel in a low-texture finish—or real tile in the cooking zone | Scrub resistance, seam cleaning, and heat clearance |
| Uneven but repairable wall | 3–6 mm rigid panel after patching and priming | Whether the panel can bridge remaining grout lines or small dips |
| Minimal renovation budget | Thin vinyl or PVC sheet with a simple repeating pattern | Waste allowance and whether replacement sheets will match |
| Permanent, high-use kitchen | Ceramic or porcelain subway tile | Installation time, grout maintenance, and substrate preparation |
Plan the layout before removing the backing
Measure the wall width and height in inches, then calculate the area. Add at least 10% for cuts and mistakes; use 15% for a wall with many outlets, corners, or a diagonal layout. For example, a 96-inch-wide by 18-inch-high backsplash is 1,728 square inches, or 12 square feet. Purchase enough material for roughly 13.2 square feet, rounded up to the next package quantity.
Subway patterns look most balanced when the visible cut pieces at the ends are not extremely narrow. Dry-fit a row and adjust the starting point so both ends finish with reasonably wide pieces. A useful target is to avoid end strips narrower than about half a tile whenever the wall allows it.
Use a level to establish a straight reference line above the countertop. Countertops and cabinets are not always perfectly level, so following the countertop blindly can make every subsequent row drift. Mark outlet locations, corners, cabinet edges, and the stopping point beneath upper cabinets before cutting.
Installation details that affect durability
- Repair holes, loose paint, and deep texture; then clean and dry the surface.
- Measure and mark a level starting line.
- Dry-fit the first row and plan cuts around outlets and corners.
- Peel back only part of the release liner, align the panel, and press gradually from the center outward.
- Use a soft roller or clean smoothing tool to remove air pockets without crushing raised details.
- Butt or overlap seams exactly as the instructions specify; do not improvise with excessive pressure.
- Allow the adhesive to cure for the stated period before washing the wall or exposing it to steam.
Keep spare material from the same production batch if possible. What wears first is usually not the printed face but the seams, corners, edges near the countertop, and areas exposed to grease. Replace a lifted panel rather than repeatedly pressing it down over dirt.
Final buying checklist
- Is the panel thick enough to hide the wall condition but thin enough for outlets and trim?
- Does the adhesive match your surface and your tolerance for paint damage during removal?
- Are the heat and moisture limits explicitly stated?
- Can the surface be cleaned without abrasive pads or harsh solvents?
- Have you calculated cuts, outlets, corners, and at least 10% extra material?
- Will the pattern look balanced at both ends of each wall?
If the wall is smooth, the area is protected from direct heat, and you value speed or reversibility, peel-and-stick subway tile can be a sensible backsplash update. If heat, water, heavy cleaning, or long-term durability is the priority, use those requirements to narrow the choice toward a properly installed ceramic or porcelain backsplash instead.