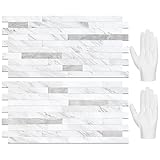
Key takeaways
- Use a cardboard template around outlets, switches, corners, and window trim.
- Leave approximately 3–6 mm at an inside corner when the manufacturer recommends a flexible sealant joint; forcing a rigid tile tightly into the corner can cause buckling.
- For aluminum, use fine metal snips or a blade approved for thin sheet material. File sharp edges before fitting.
- For PVC or gel tiles, make several controlled scoring passes instead of one deep, inaccurate cut.
- Turn off power before working around outlet boxes, and use properly sized extenders or trim if the new surface changes the box depth.
- Press from the center outward to reduce trapped air, then apply firm pressure around every perimeter and seam.
The best metallic peel and stick backsplash tiles for most kitchens are thin aluminum or aluminum-composite tiles with a pressure-sensitive adhesive, but the right choice depends on whether you prioritize a bright reflective finish, easy trimming, renter-friendly removal, or resistance to heat and moisture.
Our top picks

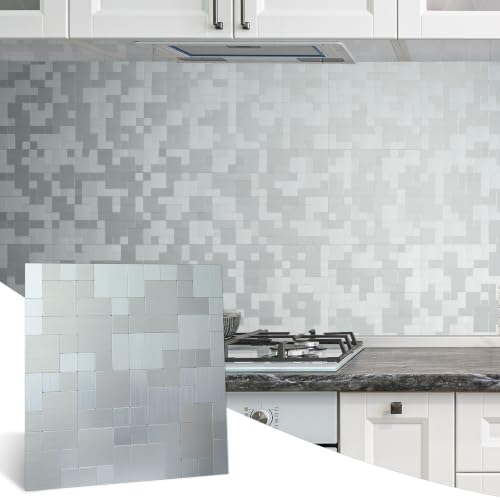


As an Amazon Associate we earn from qualifying purchases at no extra cost to you. Ratings are shown as listed on Amazon.
Best metallic peel-and-stick backsplash tiles by kitchen situation
| Kitchen situation | Best tile type | Why it fits | Watch for |
|---|---|---|---|
| Small apartment or dark kitchen | Bright aluminum mirror, polished stainless, or silver mosaic | Reflects more light and visually expands a short backsplash | Shows fingerprints, dents, and uneven walls more clearly |
| Children, pets, or frequent cooking | Brushed stainless-look aluminum composite | Hides smudges and minor scratches better than mirror finishes | Choose a sealed edge and clean grease promptly |
| Rental property | Lightweight PVC or removable gel tile with low-tack adhesive | Usually easier to cut and remove than strongly bonded metal | May soften, discolor, or lift sooner near high heat |
| Range or cooktop backsplash | Metal tile rated for the manufacturer’s permitted temperature zone | Better suited to splatter and radiant heat | Peel-and-stick products are not automatically safe directly behind burners |
| Sink wall or wet bar | Aluminum or stainless-look tile with sealed seams | Resists occasional splashes without grout maintenance | Standing water can reach the adhesive through open edges |
| Uneven plaster or textured drywall | Flexible tile only when the surface is flattened first | Can conform slightly to minor variation | Texture prevents full adhesive contact and causes early lifting |
Metal finishes compared head-to-head
Polished stainless steel
Polished stainless-look tiles deliver a clean, bright reflection and pair well with white, navy, charcoal, and wood cabinets. They make a narrow backsplash appear more open, but they also reveal fingerprints, water spots, and waviness in the wall. A soft cloth and diluted dish soap are safer than abrasive pads.
Brushed stainless steel
Brushed finishes are the most forgiving everyday option. Their directional grain disguises light scratches and dried droplets, making them practical around a sink or a busy cooktop. The reflection is softer than polished metal, so they add contrast and texture rather than a mirror effect. Match the brush direction across adjoining sheets to avoid visible changes in sheen.
Polished aluminum
Aluminum is usually lighter and easier to cut than stainless steel. A polished surface produces strong highlights and can brighten a kitchen with limited daylight. The trade-off is dent resistance: thin aluminum can crease if a pan, appliance, or tool strikes an exposed corner. Use trim or a profile around outside edges where possible.
Brushed or anodized aluminum
Brushed aluminum offers the best balance for many installations. It is light enough for wall adhesive, easier to trim than steel, and less reflective than a mirror finish. Anodized color can provide bronze, champagne, black, or gunmetal effects, but check whether the finish is intended for repeated degreasing. Some decorative coatings fade or stain when exposed to harsh cleaners.
Metal-look PVC, gel, and composite tiles
These products create metallic appearances with a printed, laminated, or coated surface. They are often the simplest to score and cut, and their greater flexibility can help on a carefully prepared wall. They are not equivalent to solid metal: the face can scratch, peel, or distort when exposed to excessive heat. They are usually better for sink walls, beverage stations, and areas away from direct burner heat.
Thickness, reflection, and adhesive: the specifications that matter
| Construction | Typical thickness | Reflective effect | Trimming difficulty | Best use |
|---|---|---|---|---|
| Flexible PVC or gel tile | About 1–2 mm | Moderate; depends on printed or coated face | Low; utility knife or heavy scissors may work | Rental-friendly, low-heat walls |
| Aluminum sheet tile | About 2–4 mm | High when polished; moderate when brushed | Medium; metal snips or a fine-tooth blade | Sink walls and general kitchen backsplashes |
| Aluminum composite tile | About 3–5 mm | Moderate to high | Medium; rigid but stable while cutting | Large backsplash areas and straighter walls |
| Stainless steel tile | About 1–3 mm | High when polished; moderate when brushed | High; edges can be sharp and difficult to shape | Durability-focused installations away from unsupported edges |
| Metal mosaic sheet | About 4–8 mm | Broken reflection with more visual texture | Medium; individual pieces may require careful cuts | Feature strips and layouts that hide small measuring errors |
Thickness affects more than appearance. Very thin tiles follow minor wall irregularities but can telegraph bumps and may dent. Thicker tiles feel more substantial and conceal small imperfections, yet they can interfere with outlet covers, corner trim, and the clearance behind countertop appliances. Before ordering, measure the tile face plus any raised pattern, not only the backing sheet.
Adhesive performance depends heavily on contact area. A tile bonds best to clean, smooth, dry, painted drywall, sealed plaster, or properly prepared laminate. Dust, cooking grease, silicone residue, flaking paint, and textured surfaces reduce the bond. Do not rely on peel-and-stick adhesive to bridge a gap over a deep wall depression.
Heat and moisture: where metallic peel-and-stick tiles can fail
Near a sink, the main risks are water entering an unsealed seam and repeated wiping loosening an edge. Apply tiles only after the wall has dried fully, press the perimeter firmly, and use a compatible kitchen sealant at exposed bottom and side edges if the manufacturer permits it. Avoid sealing over an area that needs to be removed later without planning for paint repair.
Cooktops require more caution. Steam and splatter are usually manageable, but direct flame, hot cookware, and concentrated radiant heat can damage adhesive, discolor coatings, or soften plastic-based tiles. Check the product’s heat guidance and the appliance manufacturer’s required clearances before installation. Keep combustible or heat-sensitive materials outside the permitted zone. If the tile documentation does not clearly address cooktop use, select a different backsplash material for that section rather than assuming “metallic” means heatproof.
Trimming and installation realities
Plan the layout before removing any backing paper. Measure the full wall, then subtract the widths of cabinets, counters, and trim. Start with a visible reference line rather than assuming the countertop is perfectly level.
- Use a cardboard template around outlets, switches, corners, and window trim.
- Leave approximately 3–6 mm at an inside corner when the manufacturer recommends a flexible sealant joint; forcing a rigid tile tightly into the corner can cause buckling.
- For aluminum, use fine metal snips or a blade approved for thin sheet material. File sharp edges before fitting.
- For PVC or gel tiles, make several controlled scoring passes instead of one deep, inaccurate cut.
- Turn off power before working around outlet boxes, and use properly sized extenders or trim if the new surface changes the box depth.
- Press from the center outward to reduce trapped air, then apply firm pressure around every perimeter and seam.
A 10-foot-wide backsplash with an 18-inch-high installation area covers about 15 square feet. Buy enough material for cuts and mistakes—often 10% extra for a simple layout and 15–20% for mosaics, diagonal patterns, or multiple outlets. Keep the batch label because metallic color and brushing can vary between production runs.
Which finish gives the best long-term value?
For a heavily used family kitchen, brushed aluminum or brushed stainless-look composite generally provides the most practical balance: enough reflection to add polish, fewer visible fingerprints than mirror tile, and better concealment of minor wear. For a small kitchen where brightness matters most, polished aluminum or silver mosaic creates the strongest light-bouncing effect, provided you accept more cleaning.
Renters should favor a removable product only after testing a sample in an inconspicuous area. “Removable” does not guarantee damage-free removal from old paint, wallpaper, or poorly bonded drywall. Warm the adhesive gently during removal if the instructions allow it, pull slowly, and expect that some touch-up may still be necessary.
For a cooktop, prioritize documented temperature suitability over finish or price. For a sink wall, prioritize sealed edges and a surface that tolerates repeated cleaning. The best metallic peel and stick backsplash tiles are the ones whose construction matches the wall, heat exposure, cleaning routine, and removal expectations—not simply the ones with the brightest showroom reflection.
Frequently asked questions
Can peel-and-stick metallic tiles go over existing tile?
Only when the existing tile is firmly bonded, clean, dry, and sufficiently flat. Deep grout lines can show through thin sheets or reduce adhesive contact. Filling and smoothing the joints usually produces a more durable result.
Do metallic tiles need grout?
Many sheet-style peel-and-stick products do not require grout. A small, manufacturer-approved sealant joint may still be useful at sinks, corners, and exposed edges. Never use grout or sealant that is incompatible with the tile’s coating or adhesive.
How should metallic backsplash tiles be cleaned?
Use a soft microfiber cloth with mild dish soap and water, then dry the surface. Avoid steel wool, abrasive powders, aggressive degreasers, and scraping tools, especially on coated aluminum, PVC, and mirror finishes.