Key takeaways
- Use a compatible sheet or liquid-applied membrane rated for continuous steam exposure.
- Seal all seams, fastener penetrations, niches, valve openings, and pipe penetrations according to the system instructions.
- Waterproof the ceiling, not just the walls and floor.
- Use a sloped ceiling where the design permits, commonly around 1/2 inch per foot, to reduce cold condensate dripping.
- Choose a door with tight seals and install it so the enclosure retains steam.
- Confirm that the tile substrate, setting materials, grout, and sealants are compatible with the membrane and steam-room application.
The best steam showers are sized to the enclosure—not the bathroom—and should combine a correctly rated generator, fully waterproofed walls and ceiling, controlled ventilation, easy-to-reach controls, and an installation plan that accounts for electrical, plumbing, drainage, and service access.
Our top picks
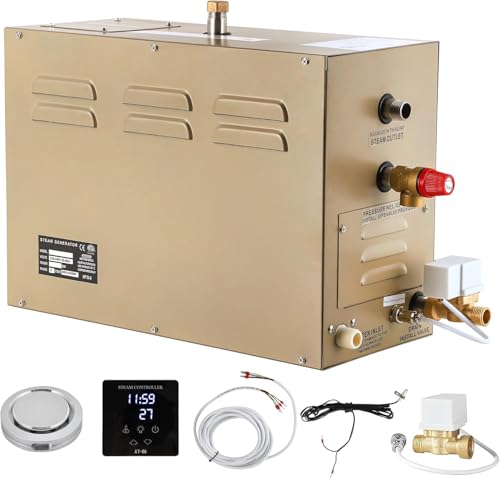


As an Amazon Associate we earn from qualifying purchases at no extra cost to you. Ratings are shown as listed on Amazon.
Best steam shower choice by bathroom situation
| Situation | Best choice | Why it works | Key caution |
|---|---|---|---|
| Small apartment bathroom | Compact 1.5–4.5 kW generator with digital control | Reaches temperature efficiently in a smaller enclosure and uses less electrical capacity | Confirm the panel can support the dedicated circuit |
| Large tiled shower or two-person enclosure | Approximately 6–12 kW generator, sized after material adjustments | Replaces heat lost through greater volume, glass, stone, and exterior walls | Large units may require a 240-volt circuit and professional electrical work |
| Household with children and pets | Enclosed digital control with timed shutoff and temperature limit | Reduces accidental activation and makes cooldown predictable | Keep the control out of direct spray and lock or supervise access if needed |
| Renter or temporary remodel | Usually a portable steam tent rather than a built-in steam shower | A true built-in system requires permanent plumbing, wiring, waterproofing, and wall access | Portable units are not equivalent to a waterproofed, code-compliant shower |
| Back pain or limited mobility | Walk-in shower with a properly supported seat, handheld spray, and low-threshold entry | Allows seated use and reduces bending while controls remain reachable | Verify the seat’s load rating and reinforce the wall before tiling |
Generator capacity: match output to enclosure size
Generator sizing begins with the steam enclosure’s interior volume. Measure the finished length, width, and height in feet, then multiply those dimensions. A 4-by-5-by-8-foot shower has 160 cubic feet. That number is only a starting point: glass doors, high ceilings, natural stone, uninsulated exterior walls, skylights, and large amounts of exposed tile can all increase the required capacity.
| Finished enclosure volume | Typical generator range | Approximate warm-up time | Suitable enclosure example |
|---|---|---|---|
| Up to 100 cubic feet | 1.5–3.0 kW | About 5–10 minutes | 3-by-4-by-7-foot shower |
| 100–200 cubic feet | 3.0–6.0 kW | About 7–12 minutes | 4-by-5-by-8-foot shower |
| 200–350 cubic feet | 6.0–9.0 kW | About 8–15 minutes | 5-by-7-by-8-foot two-person shower |
| 350–500 cubic feet | 9.0–12.0 kW | About 10–20 minutes | Large custom enclosure with substantial glass or stone |
These ranges are planning figures, not a substitute for the generator manufacturer’s sizing chart. A 10-by-12-foot bathroom is not a 10-by-12-foot steam enclosure; only the sealed shower area counts. Likewise, a 6-by-8-foot shower with an 8-foot ceiling is 384 cubic feet, which may need much more capacity than a compact enclosure even if both bathrooms have the same floor area.
Why materials change the calculation
Porcelain tile and ceramic tile generally heat faster than dense natural stone. Marble, granite, slate, thick glass, and an uninsulated outside wall absorb or lose heat, so the manufacturer may instruct you to apply a volume multiplier or select the next generator size. A sloped ceiling can help condensation run toward the walls, but it does not remove the need for correct generator capacity.
Warm-up time, controls, and daily usability
A properly sized system commonly produces steam in roughly 5–15 minutes. Warm-up can take longer when the enclosure is unusually large, the water supply is cold, the generator is undersized, or the ceiling and walls contain substantial stone. A faster warm-up is useful, but it should not be achieved by oversizing without checking electrical load, water demand, and the manufacturer’s operating limits.
Look for controls that display temperature and remaining session time. A control inside the enclosure is convenient, while a second control outside allows the user to start the system before entering. Useful features include programmable session lengths, automatic shutoff, temperature limits, and a dedicated light or music control. Controls should be installed away from direct spray and at a height reachable from the seat—often around 42–48 inches above the finished floor, depending on the user and local accessibility requirements.
For a household with children, an automatic shutoff and a conservative maximum temperature are more valuable than decorative features. Steam can cause burns quickly, and the enclosure should never be treated like an unsupervised play space.
Waterproofing is the non-negotiable requirement
Steam showers need more than ordinary shower waterproofing because vapor can migrate through grout joints, cement board, and other porous layers. The complete enclosure—including the ceiling, corners, wall penetrations, bench, curb, and door area—needs a continuous vapor-control and waterproofing assembly approved for steam-room use.
- Use a compatible sheet or liquid-applied membrane rated for continuous steam exposure.
- Seal all seams, fastener penetrations, niches, valve openings, and pipe penetrations according to the system instructions.
- Waterproof the ceiling, not just the walls and floor.
- Use a sloped ceiling where the design permits, commonly around 1/2 inch per foot, to reduce cold condensate dripping.
- Choose a door with tight seals and install it so the enclosure retains steam.
- Confirm that the tile substrate, setting materials, grout, and sealants are compatible with the membrane and steam-room application.
Steam leaks can damage framing, insulation, paint, and adjacent rooms long before the problem is visible. A fan in the bathroom cannot compensate for an enclosure that was never designed to contain vapor.
Ventilation: exhaust after the session, not during it
The bathroom still needs mechanical ventilation, but the exhaust fan should not continuously pull steam out while the generator is operating. That wastes energy, extends warm-up, and can make the system seem weak. Many designs place the exhaust fan outside the sealed steam enclosure and activate it after the door is opened or after a timed delay.
Provide a way for the enclosure to dry completely between uses. A timed exhaust cycle of about 20–30 minutes after showering is a practical starting point, subject to the fan’s capacity and local code. The bathroom fan should vent outdoors—not into an attic, wall cavity, or crawlspace. Leave a small gap beneath the bathroom door or provide another approved makeup-air path so the exhaust fan can operate effectively.
Cleaning and maintenance realities
Steam does not make a shower self-cleaning. Soap film, body oils, mineral deposits, mildew, and hair still accumulate on tile, glass, fixtures, and the bench. Wipe glass and horizontal surfaces after use, keep grout and silicone joints in good condition, and follow the generator’s descaling schedule. Hard-water homes may require more frequent cleaning or a manufacturer-approved water treatment approach.
- Use only cleaning and descaling products approved for the generator and its plumbing materials.
- Do not block the steam outlet with a bath mat, bottle, or loose object.
- Inspect the steam head, drain, door seals, grout, and silicone at least seasonally.
- Keep the generator accessible for service; do not bury it permanently behind tile.
- Replace failing caulk before water reaches framing or the waterproofing edges.
The parts that typically demand attention first are door seals, silicone joints, control buttons, shower hoses, and mineral buildup around the steam outlet—not the generator tank itself when it has been correctly installed and maintained.
Installation requirements to settle before buying
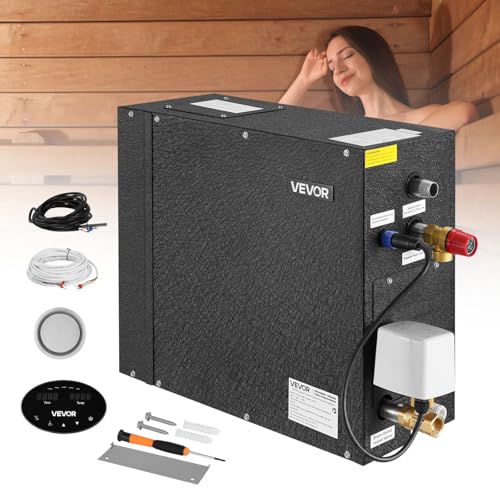
A built-in steam shower requires more coordination than a standard shower. The generator is usually installed outside the steam enclosure in a dry, accessible location such as a vanity cabinet, nearby closet, or mechanical space. It needs a cold-water connection, a drain or service-drain arrangement where specified, a steam line, and electrical power on a dedicated circuit. High-output models may require 240 volts, while smaller systems may use different electrical configurations.
The steam line should be routed according to the manufacturer’s limits, with appropriate insulation and no low spots where condensate can collect. The steam head belongs low on a wall but away from the seat and from places where bare skin could contact it. The generator should not be placed where a leak could damage electrical equipment or finished cabinetry.
Before demolition, confirm:
- Available electrical-panel capacity and required breaker size.
- Generator dimensions, service clearances, and route through doors or cabinets.
- Water pressure, pipe size, and whether filtration or softening is advisable.
- Finished enclosure dimensions after backer board, membrane, tile, and trim.
- Seat reinforcement and the seat’s stated weight rating.
- Bathroom exhaust routing and local permit requirements.
How to choose the best steam shower
For most homes, the best steam shower is not the model with the highest wattage or longest feature list. Choose the generator from the finished enclosure volume, increase the capacity when the design uses stone or extensive glass, and verify the electrical requirements before ordering. Then prioritize a continuous steam-rated waterproofing system, a sealed door, a reachable control with automatic shutoff, a properly timed exhaust plan, and an accessible generator.
If the enclosure cannot be waterproofed and serviced correctly, postpone the steam feature rather than installing a powerful generator in an ordinary shower. Good sizing and construction matter more to comfort, operating cost, and long-term durability than extra lights, speakers, or app controls.