Replacing a shower head is often a short project, but the visible fitting connects to a shower arm threaded into plumbing hidden behind the wall. Protecting that arm, matching thread and washer standards, and identifying which joints need tape are more important than tightening force.
Identify the connection system
Most North American shower heads connect to a nominal 1/2-inch shower arm, commonly using tapered pipe threads at the wall and a compatible female inlet at the head. Do not rely on diameter alone: imported fittings, proprietary rails, ceiling drops, and commercial systems can differ. Compare the exact product drawing with the installed arm.
Our top picks
 6-Setting Shower Head with Handheld
- Installation Type: Wall Mounted
- Number of settings: 6
- Material Type: Acrylonitrile Butadiene Styrene
Air-induction technology boosts pressure at low flow
Pause mode lets you cut water while lathering
360-degree bracket adjusts to any shower arm angle
ABS plastic body feels less substantial than metal heads
Six spray settings is fewer than some competing models
 Rain Shower Head with Handheld Showerhead
- Installation Type: Wall Mounted
- Flow Rate Description: 1.75 GPM
- Number of settings: 9
Magnetic docking holds the handheld securely in place
Switches between fixed rain head and handheld spray
278 nozzles deliver broad, even rain-style coverage
Dual-head design means more parts that can wear over time
59-inch hose limits reach beyond the shower stall


As an Amazon Associate we earn from qualifying purchases at no extra cost to you.
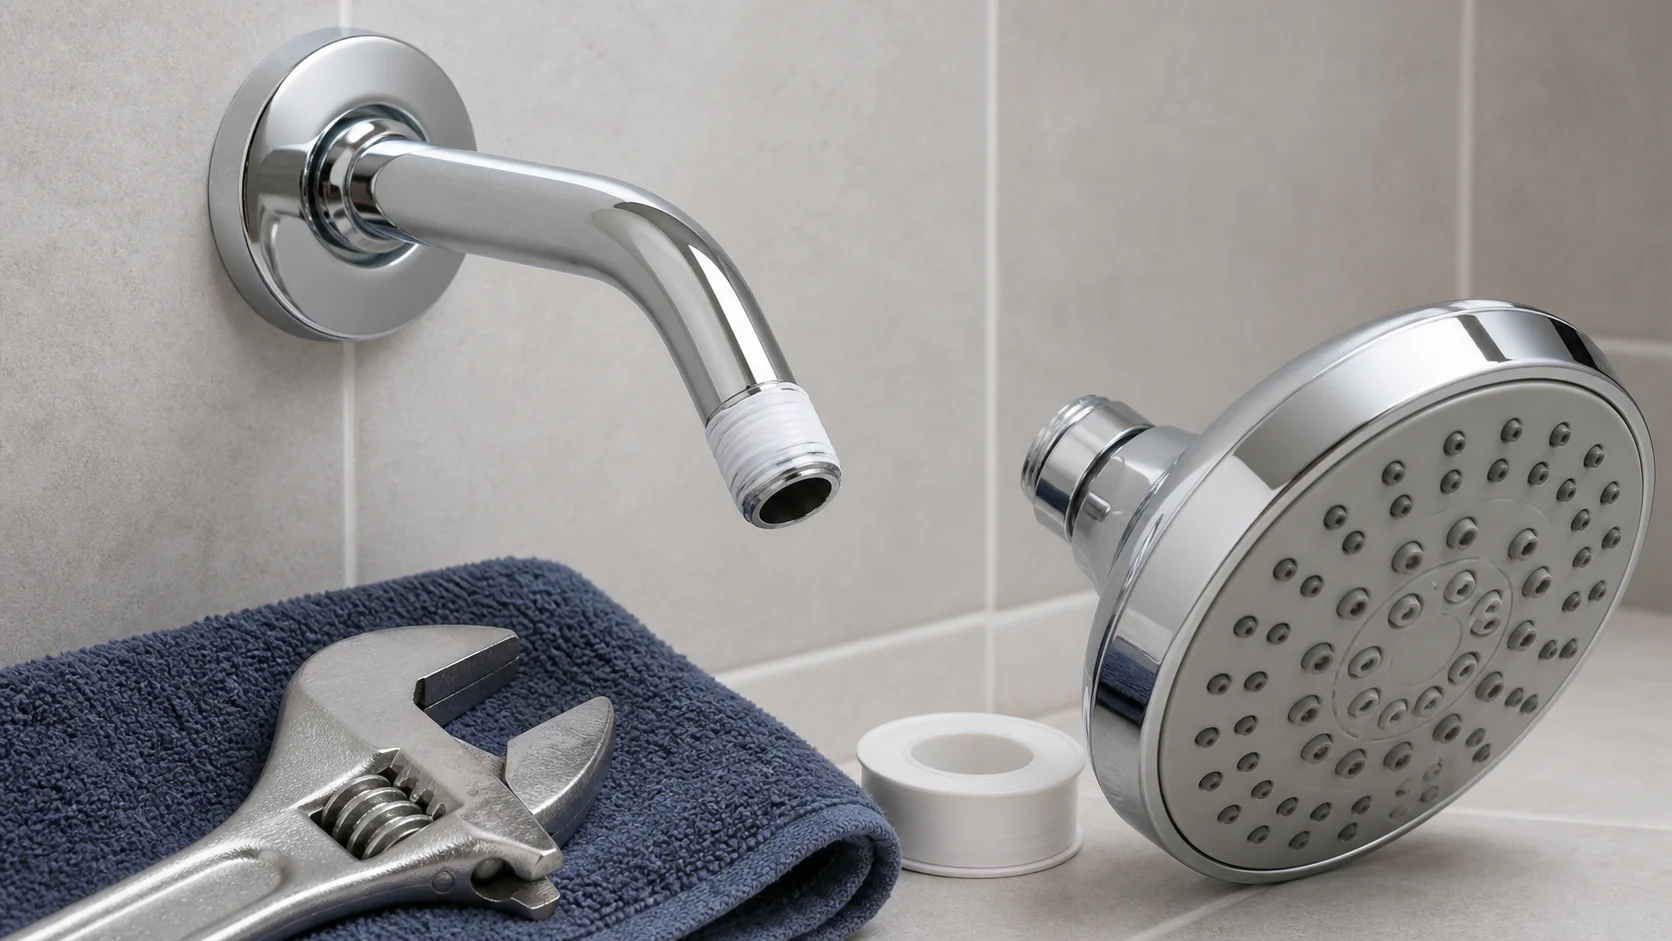
Separate thread-sealed joints from gasket-sealed joints. A fixed head may seal on tapered threads with tape. Many swivel balls, hoses, and handheld heads seal by compressing a flat washer inside a straight-thread nut. Adding tape to a washer joint does not improve the seal and can prevent correct seating. The product instructions decide.
Inspect the arm before removal
Look for corrosion, mineral buildup, cracks, movement at the wall, damaged plating, and moisture around the escutcheon. Gently test whether the arm feels solid; do not use the new head as a lever. If the arm rotates within the wall, stop. Its hidden threaded connection may be loosening, and continued turning can create a concealed leak.
Protect the tub or shower base, close the drain, and use eye protection. Hold the shower arm with a padded wrench while loosening a stubborn old head with another tool. Counterholding prevents torque from transferring to the drop-ear elbow behind tile.
Clean threads and choose seal material
Remove old tape with a soft brush or pick that will not score the threads. Wipe away scale and inspect for flattened, crossed, or cracked threads. Replace a compromised arm rather than forcing a new fitting. If arm replacement is necessary, verify the wall-side seal and insertion depth according to the plumbing and product instructions.
Where the manufacturer calls for PTFE thread-seal tape, wrap it in the tightening direction so the edge does not unravel as the fitting turns. Keep tape back from the first thread to reduce fragments entering the waterway. Use the stated number of wraps rather than building a bulky plug. Do not combine paste and tape unless expressly permitted.
Install a fixed or rainfall head
Start the head by hand. It should advance several turns without binding. Cross-threading often feels tight immediately; back off and realign instead of reaching for pliers. Tighten by hand to the position specified, then use only the modest additional movement the manual permits. Protect decorative finishes with a strap wrench or padded jaws.
A large rainfall head increases leverage on the arm. Confirm that the arm and hidden support are rated for its weight and projection. Ceiling arms, long extensions, and articulating heads may require dedicated support. A drooping escutcheon does not prove the pipe is supported.
Add a diverter and handheld hose
A typical combination kit places a diverter on the shower arm, the fixed head on one outlet, and the hose on another. Orient the diverter so its control is reachable and the hose does not rub tile or kink. Hold the diverter body while tightening connected parts so later adjustments do not loosen the wall joint.
Seat the supplied washers flat inside both hose nuts. Hand-tighten washer joints first; excessive wrench force can cut the washer or crack a plastic nut. Route the hose through its natural curve and confirm it cannot be trapped by a door or wrapped around a grab bar.
Mount the handheld bracket safely
Suction brackets are temporary and depend on a clean, smooth surface. Adhesive brackets need the maker’s surface preparation and cure time. A drilled bracket must be placed only after checking for pipes, electrical cables, waterproofing details, and suitable backing. Tile bits and anchors must match the tile and substrate.
Drilling through a waterproof shower assembly can compromise it. Stop when wall construction is unknown, the proposed hole is near supply piping, tile is cracked or unusually hard, or the bracket is expected to act as a grab bar. A handheld holder is not safety-rated support unless specifically listed for that purpose.
Do not casually alter the flow restrictor
Shower heads sold in regulated markets may include a flow-control component to meet federal, state, or local efficiency requirements. Removing, drilling, or modifying it can violate rules, void certification or warranty, increase hot-water use, and produce an uncomfortable spray without correcting low pressure.
When performance is poor, first clean the inlet screen and spray nozzles as directed, verify valves are fully open, compare pressure at other fixtures, and check whether debris entered during installation. Persistent whole-house pressure problems or sudden changes warrant plumbing diagnosis.
Leak-test in stages
Stand outside the spray path and open the valve slowly. Test at low flow, then normal operating flow. Watch the wall-side arm, head swivel, diverter outlets, hose nuts, and handset. Dry each connection and touch it with tissue; fresh moisture reveals a slow leak more reliably than a wet hand.
If a tapered-thread joint seeps, shut off the shower, relieve pressure, disassemble, inspect, and renew the approved thread seal. If a hose nut leaks, inspect washer orientation and condition rather than adding tape. Water emerging from behind the escutcheon, through grout, or from a room below is a stop condition requiring prompt professional investigation.
Final positioning and maintenance
Confirm that the head clears the ceiling and enclosure, the diverter operates without twisting its fittings, and the hose reaches the intended user without pulling the bracket. Check spray direction before leaving the enclosure unattended. Reinspect all joints after several heat cycles because expansion can reveal an imperfect seal.
Keep the manual and spare washer sizes with the model number. Clean mineral deposits only with products approved for the finish. Strong acids, abrasives, and prolonged vinegar soaking can damage coatings, seals, or internal components.
Record the installation date and take a clear photograph of the finished hose, diverter, and wall connection. That simple baseline makes later movement, staining, or a changing drip easier to identify. After the first week, repeat the dry-tissue inspection with the shower both cool and fully warm. A connection that stays dry through those conditions is more meaningful than a single test immediately after assembly.
Coordinate the next decision with the choose the right shower head.
Frequently asked questions
Does every shower-head thread need tape?
No. Tapered pipe-thread joints may require approved tape, while straight-thread hose and swivel connections commonly seal with washers. Follow the exact assembly diagram.
Why does the shower arm move?
The hidden threaded connection or its support may be loose. Stop turning the arm; opening the wall may be safer than risking a concealed leak.
Can a handheld bracket be used as a grab bar?
Not unless it is specifically designed, anchored, and listed for that load. Ordinary brackets only position the handset.
Should a flow restrictor be removed to improve pressure?
No. Diagnose debris, screens, valves, and supply pressure. Modification may breach regulations and product certification.
Conclusion
A durable shower-head installation uses the right sealing method at each joint, protects the concealed arm, supports oversized components, and respects the waterproof wall. Stop before drilling unknown construction or forcing damaged threads, and let the model manual and applicable code govern every connection.
Sources
- U.S. EPA WaterSense — Showerheads
- Moen installation support
- Delta Faucet In2ition showerhead installation instructions