Key takeaways
- Confirm the material, sheet dimensions, and usable coverage per package.
- Compare several sheets for repeated marble veining and visible color shifts.
- Check approved wall surfaces, preparation steps, and whether the adhesive is repositionable.
- Verify water and heat guidance for the exact location—not just general “kitchen-safe” wording.
- Read the removal instructions and test a sample on your wall finish.
- Plan extra material for outlets, corners, pattern alignment, and future repairs.
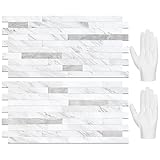
The best marble peel and stick backsplash for most kitchens is a PVC-free, waterproof tile sheet with a printed or layered marble pattern, a thick pressure-sensitive adhesive, and a clear manufacturer rating for use near sinks and cooktops; choose a removable adhesive version for a rental, and avoid any product without a stated heat limit for areas behind a stove.
“Marble peel-and-stick” can mean anything from a thin printed film to a rigid composite panel with a textured surface. The right choice depends less on the marble name than on the construction, the surface it will stick to, and how close it will be to water and heat. Use the criteria below to compare products before buying.
Our top picks


As an Amazon Associate we earn from qualifying purchases at no extra cost to you. Ratings are shown as listed on Amazon.
Best choice by kitchen situation
| Kitchen situation | What to choose | Why it suits the situation | Trade-off to check |
|---|---|---|---|
| Rental or short-term update | Thin film or flexible sheet labeled removable, with a documented surface-removal test | Less bulky and generally easier to cut and lift than rigid panels | “Removable” does not guarantee damage-free removal on every paint, grout, or wall finish |
| Busy sink area | Waterproof rigid composite or thicker PVC-free sheet with sealed edges | More substantial construction can resist splashes and wipe-downs better than a thin film | Water can still get behind unsealed seams or edges |
| Small kitchen or narrow backsplash run | Large-format sheets with a subtle, low-contrast marble pattern | Fewer seams make installation simpler, while quieter veining is less visually busy | Large sheets may be harder to align around outlets and corners |
| Wall directly behind a gas or electric range | Only a product whose manufacturer explicitly approves the exact location and gives a temperature limit | Heat tolerance varies widely across peel-and-stick materials | If the rating does not cover the distance and appliance type, use a conventional, heat-suitable backsplash instead |
| Uneven or textured wall | A conventional tile or wall repair before installation | Smooth, sound surfaces give adhesive more consistent contact | Peel-and-stick sheets often show bumps and may release at high points |
What separates convincing marble from a printed-looking sheet
Realistic marble-look backsplash has variation in both the color and direction of its veins. Before ordering, inspect several sheets or panels together, not just one product image. Look for repeated veining that may create an obvious pattern across a long wall, and check whether the finish is glossy, satin, or matte. A highly reflective surface can look less like honed marble and make seams more visible under under-cabinet lights.
Texture can improve the impression, but it is not proof of stone. Some products have a flat printed face; others add a shallow embossed pattern or a protective top layer. Ask whether the surface is designed to tolerate kitchen cleaners, grease, and repeated wiping. Avoid abrasive pads and harsh chemicals unless the manufacturer explicitly permits them, since they can dull or scratch the finish.
Compare construction before comparing looks
| Construction | Typical feel and coverage | Adhesive and installation implications | Best fit |
|---|---|---|---|
| Thin vinyl film | Flexible, lightweight, usually supplied as rolls or thin sheets | Easy to trim, but the wall needs to be very smooth; seams and surface flaws may show through | Low-splash decorative areas and temporary updates |
| Flexible tile sheet | Individual tile shapes joined on a backing; thickness and tile spacing vary | More cuts and seams than a single panel; check whether the tiles are self-adhesive or require separate adhesive | Small sections where a tile-like layout matters |
| Rigid composite panel | Thicker and more solid under the hand; often covers more wall per piece | May need careful scoring or sawing and precise alignment; heavier panels place greater demands on the adhesive | Flat, prepared walls where a more substantial appearance is desired |
These are broad construction categories, not standardized specifications. Products in the same category can differ in thickness, backing, adhesive, and approved uses. Confirm the exact material and installation method on the product instructions.
Measure coverage—and account for cutting waste
Measure the wall in inches, multiplying width by height for each rectangular section. Add the sections together, then divide by the stated coverage per package. Add about 10% for straight runs and roughly 15% for layouts with several outlets, corners, or short returns. This is a planning allowance, not a guarantee: a strong marble pattern match or difficult layout can require more.
| Backsplash section | Calculation | Area |
|---|---|---|
| 12 ft wide by 18 in high | 144 in × 18 in ÷ 144 | 18 sq ft |
| Extra allowance at 10% | 18 sq ft × 0.10 | 1.8 sq ft |
| Practical order target | 18 sq ft + 1.8 sq ft, rounded up to package sizes | About 20 sq ft |
Count the usable coverage printed on the package rather than assuming every sheet’s full dimensions will remain usable after trimming. Check whether separate sheets can be rotated or matched without creating a noticeable break in the veining. If the wall has a window, open shelves, or cabinets, measure the actual exposed backsplash rather than subtracting cutouts too precisely; trimming often creates offcuts that cannot be reused elsewhere.
Adhesion, moisture, and heat: the three checks that prevent a bad fit
Adhesive strength depends on the wall
A strong adhesive cannot compensate for dust, grease, loose paint, dampness, or a textured surface. Clean the wall using a method compatible with its finish, let it dry fully, and follow the manufacturer’s preparation instructions. Test a small piece in an inconspicuous area first. If the surface is freshly painted, wait for the paint to cure for the period recommended by the paint maker before applying anything adhesive.
Product descriptions such as “strong grip” are not a substitute for knowing which surfaces are approved. Check the instructions for painted drywall, existing tile, sealed stone, or other surfaces you plan to cover. Deep grout lines and rough tile can prevent continuous contact, leaving edges or centers more likely to lift.
Waterproof material does not mean waterproof installation
Look for a clear statement about water resistance and kitchen use, then inspect the guidance for seams, corners, and the countertop junction. Seal edges only with a compatible sealant if the manufacturer directs you to. Persistent water can work behind a sheet, particularly around sink corners and cutouts, even when the front face itself is water-resistant. Wipe splashes promptly and check edges periodically for lifting.
Heat ratings matter near cooking appliances
Do not assume that a product safe behind a sink is safe behind a range. Compare the manufacturer’s maximum temperature and required clearances with the appliance manual and local requirements. If the product provides no heat rating or does not explicitly approve installation behind your type of cooktop, leave that zone uncovered or select a conventional backsplash rated for the location. A decorative panel should never interfere with appliance ventilation or required clearances.
Repositionability and removal risk
Some sheets can be shifted briefly during installation; others bond quickly and become difficult to move once pressed down. “Repositionable” usually refers to the initial installation window, not repeated removal and reapplication. Align a dry sheet before peeling its full backing, and follow instructions for pressing it into place without trapping air.
Removal risk is highest on weak, chalky, poorly bonded, or freshly painted surfaces. Even products marketed as renter-friendly can lift paint, leave adhesive residue, or pull at wallpaper. A small test patch left in place for several days gives a better indication than peeling a corner immediately, though it cannot predict every outcome. If damage would be costly, consider installing the backsplash on a separate, removable panel rather than directly on the wall, provided the panel can be secured safely and remains compatible with the product instructions.
Quick buying checklist
- Confirm the material, sheet dimensions, and usable coverage per package.
- Compare several sheets for repeated marble veining and visible color shifts.
- Check approved wall surfaces, preparation steps, and whether the adhesive is repositionable.
- Verify water and heat guidance for the exact location—not just general “kitchen-safe” wording.
- Read the removal instructions and test a sample on your wall finish.
- Plan extra material for outlets, corners, pattern alignment, and future repairs.
For a low-splash wall and a temporary cosmetic update, a removable film can be the simplest choice. For a frequently splashed sink area, prioritize a sturdier, water-resistant construction and carefully sealed edges. For the wall behind a range, choose only a product with explicit approval for that heat exposure—or use a different backsplash material. Those location-specific checks matter more than a product’s marble label or thickness alone.