Key takeaways
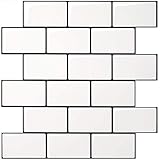
The best peel-and-stick backsplash tiles for kitchen updates are thicker composite tiles for the most convincing finish, gel tiles for renters who want easy trimming and strong visual depth, and vinyl tiles for the lowest-cost, quickest refresh—provided the surface is smooth and the area is not exposed to direct high heat.
Choosing between them depends less on the pattern than on four practical questions: how close the backsplash is to a cooktop, whether steam and splashes are frequent, what the wall is made of, and how many outlets or corners must be cut around. A peel-and-stick backsplash can update a kitchen in an afternoon, but the adhesive and tile construction determine whether it still looks secure a year later.
Our top picks


As an Amazon Associate we earn from qualifying purchases at no extra cost to you. Ratings are shown as listed on Amazon.
Vinyl, gel, and composite tiles compared
| Tile type | Typical thickness | Heat and moisture performance | Best surface | Trimming around outlets | Typical material cost |
|---|---|---|---|---|---|
| Vinyl sheet or thin tile | About 1–2 mm | Good for ordinary splashes; limited near direct heat | Clean, smooth painted drywall, laminate, or sealed backsplash | Very easy with a utility knife and straightedge | Usually $1–$4 per sq. ft. |
| Gel or 3D gel tile | About 3–5 mm | Better moisture resistance and visual depth; still needs heat clearance | Flat, sealed, lightly textured walls with strong adhesion | Easy to moderate; raised faces may need several passes | Usually $3–$8 per sq. ft. |
| Composite or rigid stone-look tile | About 4–8 mm | Most stable around moisture; some products tolerate more heat, but none should touch a flame | Sound, smooth, well-prepared walls; often less forgiving of bumps | Moderate to difficult; use a fine-tooth saw or scoring tool when specified | Usually $6–$15 per sq. ft. |
These are general ranges rather than universal specifications. Always check the manufacturer’s installation sheet for maximum temperature, cleaning restrictions, and whether the tile is approved behind a range. “Water-resistant” usually means it can handle splashes after the seams are sealed; it does not mean water can sit behind the panels or that the adhesive is suitable for a constantly damp wall.
Which tile is best for your kitchen situation?
| Your situation | Best starting choice | Why | Watch for |
|---|---|---|---|
| Small apartment or quick cosmetic update | Thin vinyl | Lightweight, inexpensive, and easiest to remove or replace | Thin material can reveal wall dents and may look less dimensional |
| Rental with a smooth painted wall | Removable vinyl or lighter gel tile | Simple to cut and install without adding much wall load | Test adhesion and removal on an inconspicuous area first |
| Children, pets, and frequent splashes | Sealed gel or composite tile | More substantial faces resist scuffs and are easier to wipe clean | Raised joints can collect grease unless sealed and cleaned regularly |
| Wall beside a sink or dishwasher | Gel or composite | Better coverage and moisture resistance than the thinnest vinyl | Seal exposed edges, corners, and the counter joint |
| Backsplash beside a gas or electric cooktop | Heat-rated composite, or a conventional hard backsplash in the hottest zone | Greater dimensional stability and more robust surface construction | Follow the cooktop and tile clearances; do not rely on adhesive alone |
| Many outlets, switches, or awkward corners | Thin vinyl or flexible gel | Fastest and cleanest to score around electrical boxes | Measure the faceplate overlap so small cutting errors remain hidden |
Heat resistance: the deciding factor behind the range
Peel-and-stick products are most dependable on the counter wall, around a sink, or on a breakfast-bar backsplash. The area immediately behind a cooking appliance is more demanding because heat can soften adhesive, warp a flexible layer, discolor printed surfaces, or open seams.
As a practical rule, leave a conventional heat-safe zone between the tile and burners as required by the appliance manufacturer. Do not assume that a tile advertised as heat-resistant is safe against direct flame, a hot pan, or an uncovered griddle. If the product’s instructions do not provide a temperature rating or explicitly address range installation, use it away from the hottest area or choose a traditional tile, metal panel, or other approved heat shield instead.
Composite tiles generally handle temperature changes better because their thicker, more rigid cores move less than thin vinyl. However, rigidity creates another problem: a composite panel can bridge a bump in the wall and leave an air pocket, while vinyl may conform to it. A smooth substrate matters more than thickness.
Moisture, seams, and surface compatibility
The safest installation surface is clean, dry, smooth, and sealed. Painted drywall should be fully cured and free of chalky residue. Glossy paint may need light scuffing if the product instructions allow it. Degreased laminate, sealed wood, and an existing flat backsplash can work well after cleaning and drying.
Avoid applying adhesive tile over loose wallpaper, powdery paint, active mold, damp drywall, heavily textured walls, failing grout, or surfaces coated with silicone or grease. Tile may stick initially but release when steam reaches the edges. For a wall with moderate texture, a thicker tile can hide minor irregularities, but it cannot reliably bridge deep grooves or loose material.
Measure the backsplash as separate rectangles rather than one large area. For example, a 10-foot counter with an 18-inch backsplash requires 15 square feet before deductions. Add 10% to 15% for pattern matching, mistakes, and future repairs. A complex pattern or diagonal layout can require closer to 20% extra.
Trimming cleanly around outlets and corners
Thin vinyl is the easiest choice when the backsplash contains several receptacles. Its main limitation is that a cutout can tear if the faceplate does not cover the edge. Gel and composite products produce a more substantial result, but their raised patterns and rigid cores require slower, more careful cuts.
- Turn off power at the electrical panel and confirm that the outlet is not energized before removing a faceplate. If you are not comfortable working around electrical boxes, have an electrician handle the adjustment.
- Hold the tile over the outlet location and mark the opening from the back whenever possible. Measure from two finished edges rather than guessing from the countertop.
- Make the opening slightly smaller than the faceplate, not larger. A typical wall plate covers a limited border, so leave enough material for a clean perimeter.
- Score thin vinyl several times with a sharp utility knife and snap it over a straightedge. For gel tile, use a new blade and make multiple shallow passes through the raised surface.
- For rigid composite, follow the product’s cutting instructions. A fine-tooth handsaw, oscillating tool, or scoring method may be appropriate; forcing a knife through a rigid core can crack the face.
- Dry-fit every piece before removing the release liner. Around an inside corner, leave a small expansion allowance if the instructions call for one, then cover the joint with a compatible trim or sealant.
Electrical boxes may sit too far back after a thick tile is installed. Do not simply leave a deep gap behind the receptacle. An electrician can install approved box extenders so the device remains properly supported and the faceplate sits flat.
Installation details that determine durability
Clean with a degreasing cleaner that leaves no oily film, then allow the wall to dry completely. Many installers achieve better adhesion by waiting at least 24 hours after cleaning and keeping the room within the product’s recommended temperature range. Cold walls reduce tack; excessive heat can make repositioning difficult.
Begin at a visible, level reference line rather than assuming the countertop is perfectly straight. Press from the center of each tile outward, especially along seams and edges. Use a roller or firm cloth to remove air pockets without stretching flexible material. Do not wash the backsplash immediately; follow the product’s stated cure time, commonly about 24 to 72 hours.
The first areas likely to show wear are exposed bottom edges, corners near the sink, seams beside the range, and any section installed over grease residue. A narrow bead of manufacturer-approved kitchen-and-bath sealant at the counter joint and outside corners can limit water intrusion, but sealant cannot rescue a loose or poorly bonded tile.
Bottom line
Choose vinyl when low cost, removability, and easy outlet cuts matter most. Choose gel tile when you want a more dimensional pattern with relatively forgiving installation around a sink or countertop. Choose thicker composite tile when appearance, rigidity, and everyday wipe-clean durability outweigh a higher price and more difficult cutting. For any location exposed to direct burner heat, select only a product with clear heat-use instructions—or use a conventional heat-rated backsplash for that section.