The cabinet beneath a sink contains both pressurized water connections and a gravity drain. A small supply leak can release water continuously, while a drain leak may appear only when the basin empties. Understanding the trap, supply lines, shutoff valves, drain fittings, and optional appliance branches makes inspection faster and storage safer.
Plumbing codes and approved materials vary. Work involving concealed pipes, damaged valves, shared drains, disposal wiring, or persistent sewer odor should be handled by qualified professionals.
Our top picks


As an Amazon Associate we earn from qualifying purchases at no extra cost to you.
Pair this map with the staged checks in our faucet leak repair guide. The International Code Council plumbing-code resources explain the model-code framework; the locally adopted code and product instructions govern actual work.
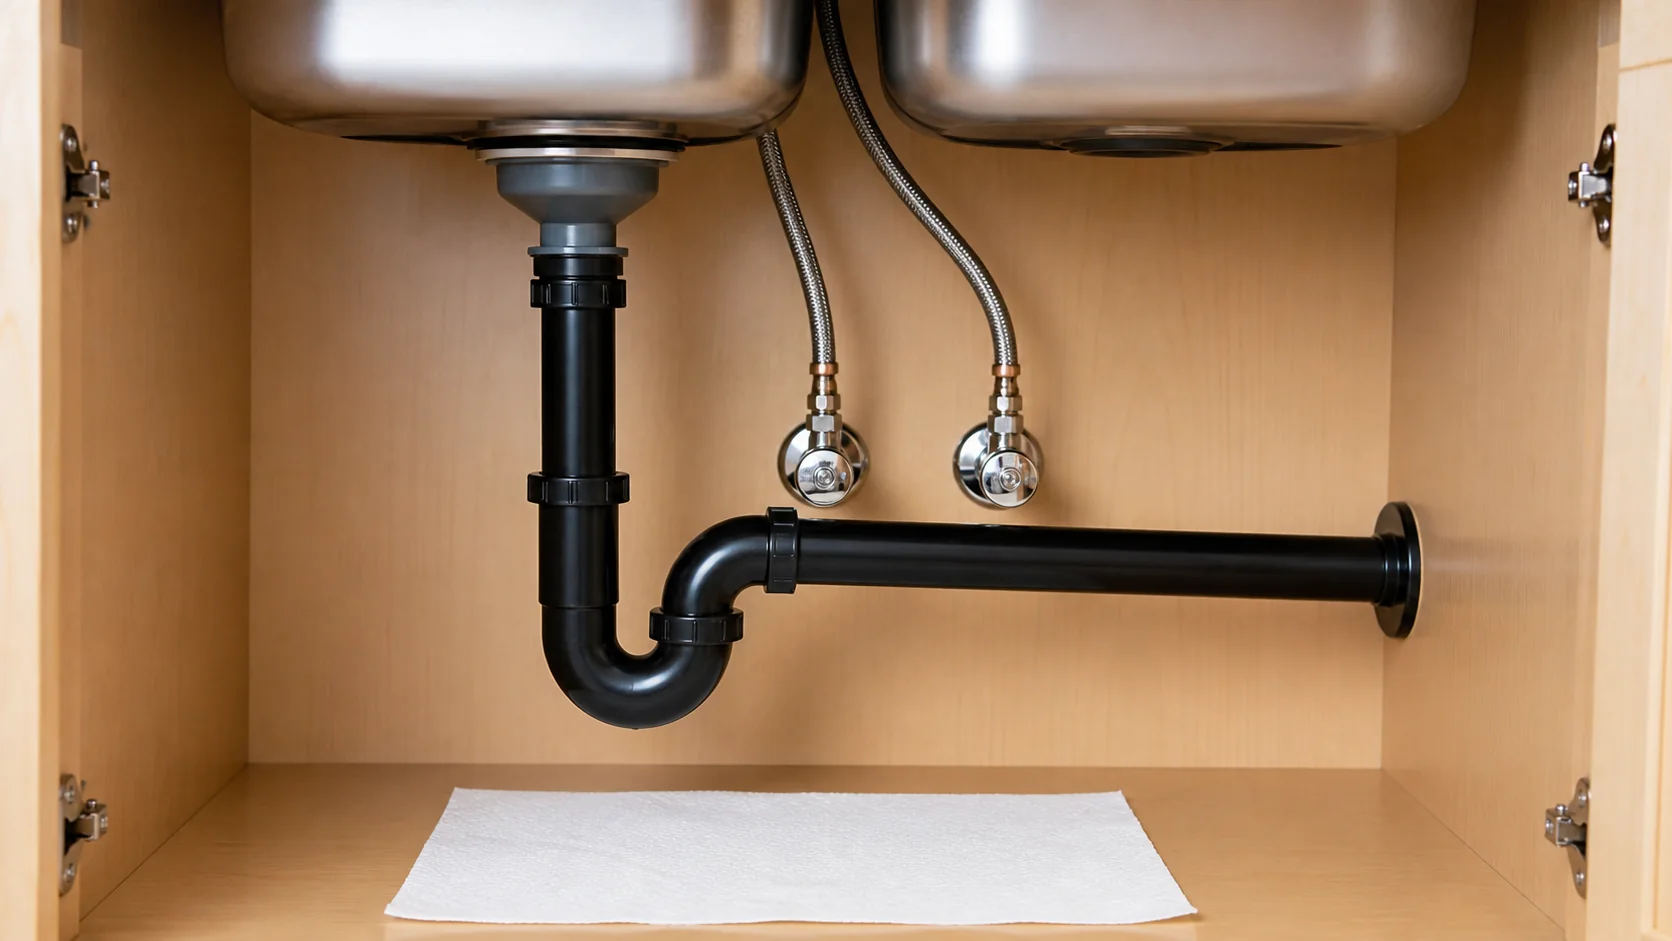
Identify the Main Components
Hot and cold branch pipes terminate at shutoff valves, which connect to the faucet through supply lines. The sink outlet connects to a strainer or drain body, then a tailpiece. A P-trap holds water that blocks sewer gases and connects through a trap arm to the wall drain.
A kitchen may add a garbage disposal, dishwasher drain hose, filtered-water system, or separate faucet. A bathroom may include a pop-up drain linkage. Each addition creates connections that should remain visible and serviceable.
Understand the P-Trap
The P-trap’s curved section retains a water seal. It should be configured and vented according to code, with a trap arm that drains correctly. An S-shaped arrangement or excessive vertical drop can siphon the seal. Flexible accordion-style drain tubing collects debris and may not be approved.
Slip-joint washers seal many tubular trap connections. Their orientation matters, and the pipes must align without being forced. Over-tightening plastic nuts can crack them; loose or misaligned joints leak. The trap should be removable for cleaning and accessible without dismantling cabinetry.
Inspect Supply Lines
Supply connectors must be long enough to reach without tension but not looped tightly or kinked. Inspect for corrosion, fraying, bulges, discoloration, and moisture at both ends. Replace damaged connectors with approved lines of the correct length and connection sizes.
Many connectors seal with captive gaskets, not thread tape. Applying sealant to the wrong fitting can interfere with the gasket. Support the valve while connecting so piping inside the wall is not twisted.
Exercise Shutoff Valves Carefully
Fixture valves allow faucet service without shutting down the whole home. Identify which serves hot and cold. Turn valves gently; an old valve may seize or begin leaking at the stem. If it does not close fully or shows corrosion, arrange replacement rather than applying force.
Know the location of the main water shutoff before beginning any repair. Ensure all household members can reach it and understand when to use it. Do not hide fixture valves behind fixed shelves or tightly packed storage.
Check Drain and Accessory Connections
Inspect the sink strainer or drain body where it meets the basin, the tailpiece, trap joints, and wall adapter. Fill the basin, then release a full volume of water while observing each joint with a flashlight. A connection may remain dry under a small trickle but leak under a full discharge.
A dishwasher drain typically requires an approved high loop or air-gap arrangement according to local rules and the appliance instructions. Secure the hose so it cannot sag or contact sharp edges. Disposal connections must be correct, and electrical work must remain dry and code compliant.
Water filtration tubing should be supported, cut square, and inserted fully into compatible fittings. Label valves and cartridge flow direction. After any filter change, flush and leak-test according to the manufacturer.
Perform a Systematic Leak Check
Empty the cabinet and dry every surface. Place paper below each connection. First, leave the faucet off and observe pressurized supply connections. Second, run hot and cold water separately. Third, fill the sink and release it. Fourth, operate the sprayer, disposal, dishwasher, or filter if present.
Trace moisture upward because water can travel along a hose before dripping. Check the faucet base and sink rim; not every puddle originates below. Repeat the inspection after ten minutes and again later.
Use the Cabinet Without Hiding Problems
Use removable bins that preserve sightlines to valves and joints. Do not stack bottles against supply hoses or the trap. A waterproof removable liner can protect the cabinet floor, but it should be lifted periodically to check for trapped moisture.
Never store incompatible cleaners together, and keep chemicals secured from children. Do not allow stored items to press a disposal switch, kink tubing, or block ventilation and service space.
Signs That Require Professional Help
Call a plumber for a valve that will not shut off, recurrent blockage, sewer odor despite a full trap, corroded wall piping, leaking concealed connections, improper trap geometry, or evidence of cabinet and floor damage. Electrical moisture near a disposal or outlet requires immediate power and safety attention.
Drying the cabinet without correcting the source invites mold and structural deterioration. Replace swollen cabinet material only after plumbing is repaired and the area is fully dried.
Document the Cabinet Before and After Service
Take a clear photo before disconnecting anything. Label hot and cold supplies, filter tubing, dishwasher hoses, and shutoff positions. If several white tubes cross the cabinet, temporary numbered tags prevent an incorrect reconnection. Keep the faucet, filter, disposal, and dishwasher manuals nearby because their fittings can require different sealing methods.
After service, photograph the completed arrangement and note replacement dates on supply connectors and filter cartridges. A simple diagram can show where the main shutoff and fixture valves are located. This information is especially valuable for a future homeowner, tenant, or emergency plumber.
Do not use labels to compensate for a tangled or unsupported installation. Tubing should be routed away from sharp edges, drawer hardware, hot equipment, and stored objects. Maintain the air gaps, high loops, supports, and service clearances required by the relevant appliance and plumbing instructions.
Inspect cabinet panels after drying. Persistent staining, softness, odor, or delamination may indicate that the leak lasted longer than expected or reached flooring and wall cavities. Plumbing repair stops new water, but damaged materials may still require remediation. Escalate when the affected area cannot be fully seen or dried.
Condensation should not be confused automatically with a fitting leak. Cold pipes can sweat in warm, humid air, while a loose faucet may allow sink-deck water to run down a supply line. Dry everything, reproduce one condition at a time, and trace moisture to its highest wet point. Insulation may help appropriate cold lines only after active leaks are excluded and local guidance is followed. Persistent cabinet humidity also warrants checking room ventilation. Do not seal damp pipes and panels inside an airtight enclosure, because concealed moisture can continue damaging finishes and supporting materials.
Frequently Asked Questions
Why is there water in a P-trap?
The retained water creates a seal that blocks sewer gases. An empty trap can allow odors into the room.
Can I use flexible accordion pipe under a sink?
It often traps debris and may not comply with local code. Use approved smooth-wall components configured correctly.
How often should under-sink plumbing be checked?
Inspect periodically, whenever contents are removed, and after plumbing or filter service. Address odor, swelling, or moisture immediately.
Why does the cabinet leak only when the sink drains?
The likely source is a drain-side joint, strainer, trap, or accessory connection rather than a continuously pressurized supply line.
Should under-sink valves be left accessible?
Yes. Quick access limits damage during a leak and allows routine faucet service.