Bathroom vanity installation succeeds or fails in the sequence. Secure, level, and align the cabinet with rough plumbing before the countertop locks its geometry in place. Work from survey to cabinet, countertop, sink, backsplash, plumbing, cure, and leak testing. Exact fasteners, adhesives, and cure periods remain product-specific.
Survey the room before removing anything
Measure the wall at floor, cabinet-top, and backsplash height; older walls are rarely perfectly square. Mark finished-floor high points, baseboard thickness, door swing, drawer travel, supply valves, drain centerline, outlets, and trim. Compare those measurements with the cabinet’s actual back openings and the sink bowl below the top. A centered faucet does not guarantee that the trap clears a drawer or shelf.
Our top picks



As an Amazon Associate we earn from qualifying purchases at no extra cost to you.
Confirm the new unit’s width, depth, height, sink position, and side clearances before dismantling the old one. The guide to choose the correct bathroom vanity size is useful at this gate. Inspect the delivered pieces for cracks, twist, finish damage, and missing hardware while return options remain open. Stone and integrated tops are heavy; plan enough help and a protected staging surface.
Close both fixture stops and open the faucet to verify that flow ends. A valve handle that turns without stopping water is not a working isolation point. Shut off the appropriate upstream supply before disconnecting anything. Place a tray under the trap, photograph the existing arrangement, and cap open piping if installation will pause.
Prove the wall can carry the vanity
Locate studs with more than one method and consider possible pipes or wiring before drilling. Mark stud centers where the cabinet’s structural rail can reach them. A thin decorative back panel is not a mounting rail. Kohler’s 1216525 vanity instructions require fastening to stud framing and recommend 2×6 bracing behind the finished wall when possible. That same manual specifies model-related 5/16-inch lag bolts and washers with a minimum 250-pound load rating, with length calculated for backing, wallboard, and rail thickness. Those dimensions are not generic values for another vanity; they illustrate why its own engineering instructions control.
A floating cabinet imposes different loads from a floor-supported unit. If its mounting rail misses framing, do not assume plastic drywall anchors are adequate. Open the wall for rated blocking or obtain a manufacturer-approved anchoring design. Review the differences between floating and freestanding vanities before treating their supports as interchangeable.
Prepare plumbing openings without weakening the cabinet
Remove drawers and doors according to their release instructions to reduce weight and improve access. Transfer the supply and drain centerlines to the cabinet back. Drill smooth, adequately sized openings that allow connection and future service without crushing a pipe. Keep cuts away from rails, corners, hangers, and fastener zones. Seal exposed composite-wood edges only with a finish the cabinet maker permits.
Never force the cabinet around a drain that is too high, too far sideways, or trapped behind a drawer box. Offset fittings can introduce poor drainage or inaccessible joints. Stop when the rough-in must move, a vent configuration is uncertain, shutoffs are corroded, or pipework shows active leakage. A licensed plumber can resolve the layout before the cabinet conceals it.
Level, shim, and fasten the cabinet
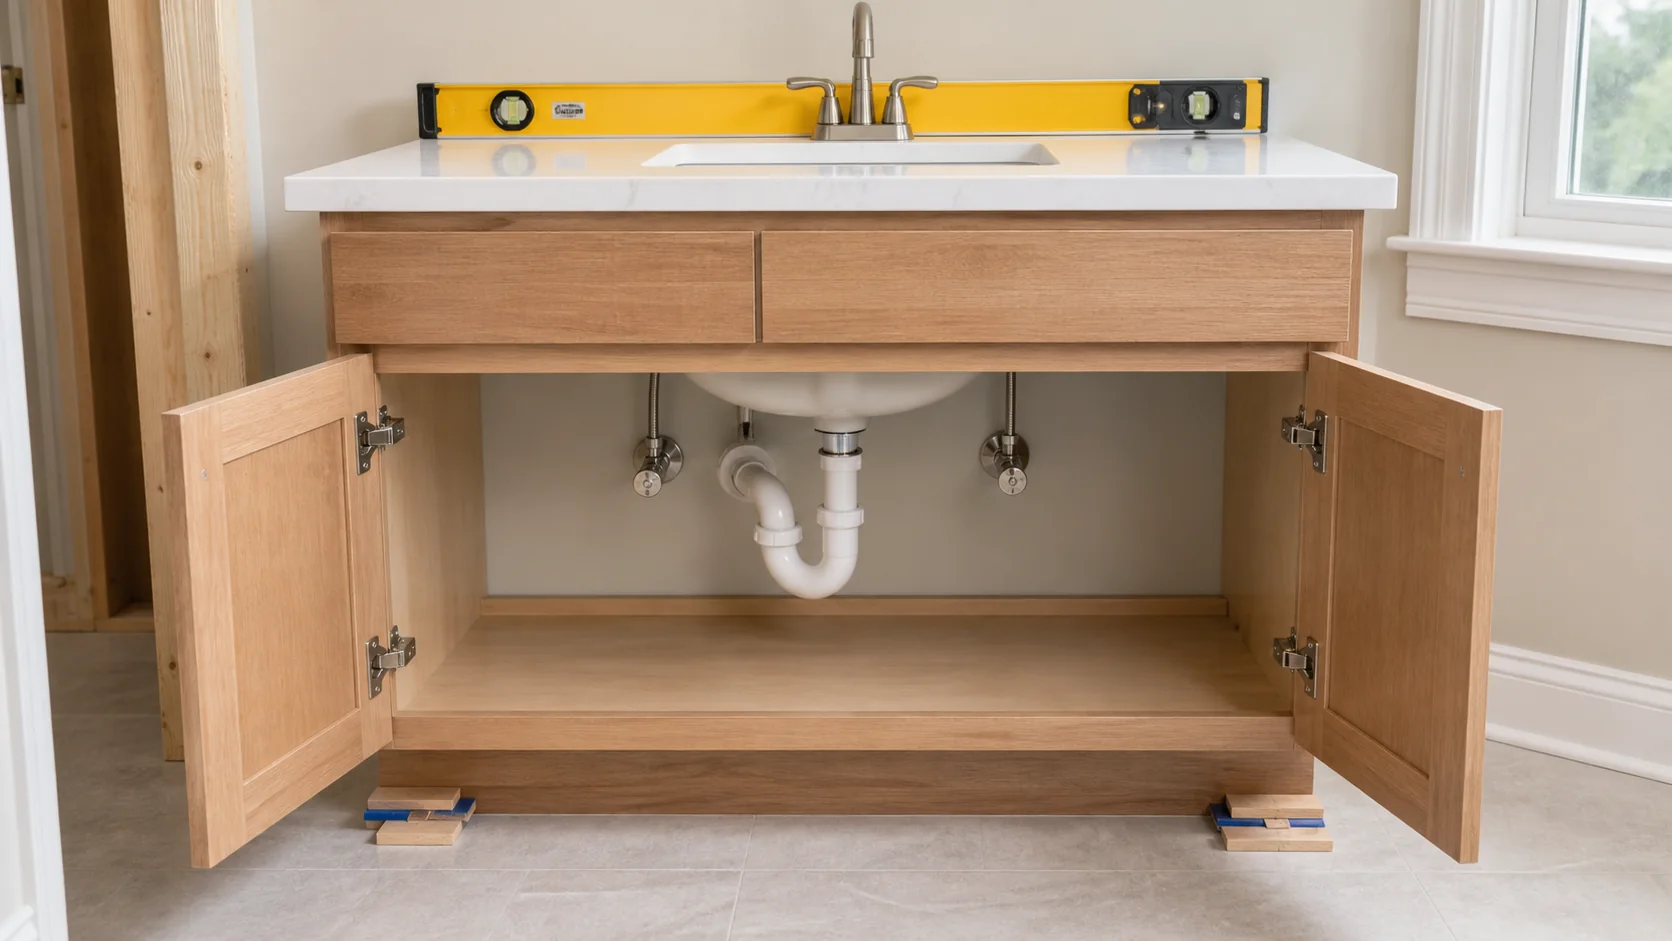
Set the empty cabinet in position and check level front-to-back and side-to-side, then check both sides for plumb. Begin at the floor’s high point. Use built-in levelers where provided. Otherwise place durable, moisture-resistant shims beneath load-bearing cabinet sides or specified contact points—not under the middle of a thin bottom panel. Do not pull a twisted cabinet straight by overtightening wall screws.
Once gaps and plumbing clearance are acceptable, drill pilot holes through the designated rear rail at verified framing. Select fastener diameter, length, washers, and spacing from the cabinet instructions and wall construction. Tighten progressively while watching the level. The goal is firm contact without crushing the rail or bowing the case. Recheck drawer openings diagonally and temporarily reinstall moving parts to confirm they operate freely.
For an uneven wall, preserve a level cabinet and scribe a filler or side panel instead of forcing the box to follow the wall. A small rear gap may be handled by the approved backsplash detail; a large or changing gap needs a planned trim solution. Never use caulk to disguise movement or substitute for fastening.
Dry-fit the top, sink, and faucet
Place the unsealed countertop on the cabinet with help. Confirm equal overhangs, full rail support, wall fit, faucet clearance, bowl clearance, and access to clips and supply connections. A top that rocks reveals a cabinet-level or support problem that must be corrected first. Kohler’s lavastone guidance warns that an unlevel countertop can break and requires the supporting brackets or cabinet to be level before installation.
If the sink is separate, follow its instructions for clips, adhesive, reveal, and support. Do not improvise support for an undermount basin. Installing the faucet and drain body while the top is accessible often reduces awkward work, but only when their manuals permit it and the assembled top can still be moved safely. Protect finished surfaces from tools.
Set the countertop and complete wall seams
Lift the top, clean the approved bonding surfaces, and apply only the sealant specified for that combination. Chemistry matters: Kohler’s 1216525 guide requires siliconized acrylic caulk for its vanity and warns that 100-percent silicone can damage the finish. A different stone, cultured-marble top, or cabinet may explicitly require silicone. Never transfer one product’s sealant rule to another.
Lower rather than slide the top into position, align it without smearing adhesive across visible surfaces, and remove squeeze-out using the approved method. Install a separate backsplash only after its dry fit confirms faucet and mirror clearance. Seal the top-to-backsplash and backsplash-to-wall joints as directed, leaving any intentionally open drainage or movement detail unobstructed.
Respect the sealant label’s cure time and conditions. “Skin-over” is not full cure. Temperature, humidity, bead thickness, and material affect timing. Do not load the sink, run water, or disturb the joint before the applicable cabinet, sink, and sealant instructions allow it.
Connect supplies and drain without imposed stress
Route supply connectors without twists, sharp bends, abrasion, or contact with drawer hardware. Hold the valve body with a backup wrench if its instructions require one; turning an old stop inside the wall can create a concealed leak. Do not add thread tape to compression fittings unless the fitting maker specifies it.
Assemble the drain in the manufacturer’s order. Align the trap naturally between the tailpiece and wall connection rather than pulling it sideways with slip nuts. Washers must face the specified direction, and service joints should remain visible. If the trap will not align without strain, change the approved tubular configuration or call a plumber instead of flexing rigid pipe.
Commission with staged leak tests
- Keep the cabinet empty, place dry paper beneath each joint, and open the stops slowly.
- Inspect the valve stems, supply outlets, faucet inlets, and faucet body before using the drain.
- Run cold and hot water separately, then together, while checking supply connections.
- Close the stopper, fill the bowl to the overflow when one is present, and inspect the drain body.
- Release the full basin and watch every trap joint under peak discharge.
- Operate the faucet through its range and confirm hoses do not rub drawers or doors.
- Dry all joints, repeat the test, and inspect again after several hours and the next day.
Kohler’s 1421084 vanity guide ends its faucet and drain connection sequence by directing the installer to run water and check for leaks. A tissue or dry paper makes a small fresh seep easier to distinguish from installation splash. Moisture at a wall opening, swelling cabinet material, recurring odor, or a joint that leaks after correct reassembly is a stop condition—not a reason to hide the connection.
When this should become a professional job
Pause for missing structural backing on a floating vanity, uncertain wall utilities, damaged or ineffective shutoffs, relocated drain or vent piping, mold, soft flooring, extensive wall damage, stone cutting, electrical changes, or a countertop too heavy to control safely. Also stop if product instructions conflict or specified fasteners cannot engage the required structure. The related guide can help plan the vanity installation budget when carpentry, plumbing, fabrication, or electrical work expands the scope.
Frequently asked questions
Should the cabinet or countertop be installed first?
Secure and level the cabinet first, then dry-fit and attach the countertop. The cabinet establishes the support plane; sealing a top onto a misaligned base makes correction harder and can stress the top.
Can shims replace fastening to the wall?
No. Shims support level and prevent distortion; rated fasteners into the structure resist movement. Each performs a different job.
Must the vanity touch an uneven wall everywhere?
No. Keep the cabinet square and plumb. Use an approved filler, scribed panel, or backsplash treatment rather than twisting the box to follow an irregular surface.
How soon can the sink be used after caulking?
Use the longest applicable cure period stated by the cabinet, sink, countertop, and sealant makers. A bead that feels dry on the surface may not have cured through.
Why does a trap leak only when the basin drains?
A drainage-only leak often points to a misaligned slip joint, reversed or damaged washer, loose connection, drain-body seal, or overflow path. Disassemble and correct the geometry; do not rely on exterior caulk.
A durable installation has three proofs
The finished vanity should be structurally firm, geometrically true, and hydraulically dry. Confirm all three before loading drawers or closing access: the mounting rail engages approved structure, the cabinet and top remain level without distortion, and every supply and drain joint passes staged testing after the required cure. Photographs of blocking, fasteners, and open plumbing plus saved model instructions will make future service safer.
Primary installation references
- Kohler 1216525 vanity installation and care guide
- Kohler 1421084 bathroom vanity installation guide
- Kohler 1012594 countertop installation guide