Key takeaways
- Basin wrench and adjustable wrenches sized for the connections
- Bucket, absorbent towels, flashlight, safety glasses, and work gloves
- Plastic scraper and a cleaner approved for the sink or countertop
- Manufacturer-specified gasket, sealant, thread tape, or joint compound only where directed
- Correct supply lines when the faucet does not include integrated lines
- Painter’s tape, labels, phone camera, and the printed installation manual
- Noncontact voltage tester when working near a disposal receptacle or powered faucet
A successful kitchen faucet installation begins while the old faucet still works. The replacement must match the sink holes, deck thickness, backsplash clearance, shutoff connections, and cabinet space. Pull-down hoses, side sprayers, soap dispensers, disposals, filters, and electronic control boxes all compete below a surface that looks empty from above.
This guide covers a typical deck-mounted replacement. The exact faucet instructions govern gasket order, sealant, mounting hardware, hose connections, electrical components, torque, and flushing. Wall-mounted faucets, new holes in stone or brittle sinks, failed valves, concealed damage, and changed plumbing usually need professional help.
Our top picks


 Commercial Kitchen Faucet Wall Mount with Pre-Rinse
- ⚠CONTACT US - if the hose has length…
- ⚠Customer Service - All kitchen faucets are backed…
- Commercial Sink Faucet - This wall mounted pre-rinse…


As an Amazon Associate we earn from qualifying purchases at no extra cost to you.
Compatibility Audit Before Shutdown
Count every usable hole from below because an escutcheon can hide the real pattern. Record center-to-center spacing, hole diameter, and deck thickness. Note whether an unused opening will receive a soap dispenser, air switch, side spray, filtered-water faucet, or matching cover. Confirm that the new handle clears the backsplash throughout its travel.
Measure spout reach to the bowl center and overall height below a window, shelf, or cabinet. A taller arc does not guarantee better function in a shallow sink; water striking too near the front can splash. Compare the exact technical drawing rather than a retailer’s rounded dimensions.
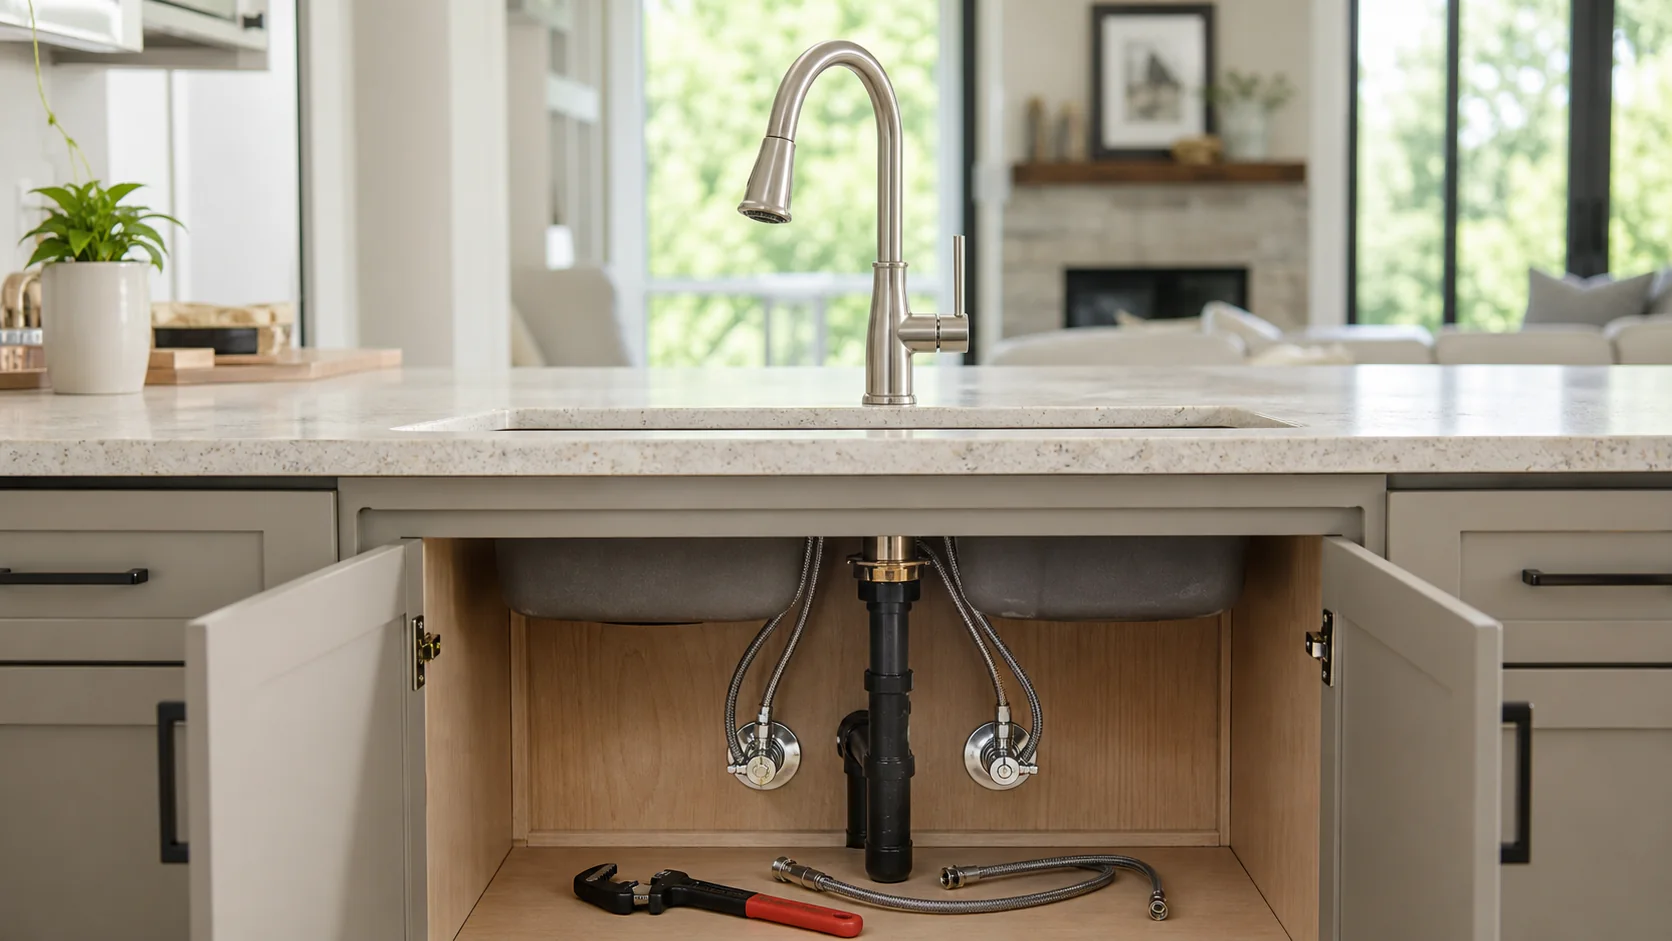
Inside the cabinet, identify hot and cold shutoffs, outlet thread or compression size, supply-line condition, disposal, trap, dishwasher hose, filter, and electrical receptacle. Operate each stop gently. If it will not close, begins leaking at the stem, or moves the pipe in the wall, stop and have it repaired before faucet day.
Tools, Parts, and Work-Zone Setup
- Basin wrench and adjustable wrenches sized for the connections
- Bucket, absorbent towels, flashlight, safety glasses, and work gloves
- Plastic scraper and a cleaner approved for the sink or countertop
- Manufacturer-specified gasket, sealant, thread tape, or joint compound only where directed
- Correct supply lines when the faucet does not include integrated lines
- Painter’s tape, labels, phone camera, and the printed installation manual
- Noncontact voltage tester when working near a disposal receptacle or powered faucet
Clear the entire cabinet and protect the floor. Switch off disposal power at the breaker if tools or water could reach its wiring, then verify the condition according to safe electrical practice. Know where the dwelling’s main water shutoff is located. Keep children and pets outside the work area.
Inventory every new part against the manual. Identify the base gasket, mounting washer, nut, spray hose, quick-connect clip, hose weight, aerator key, battery holder, control module, and optional deck plate. Do not begin when a unique clip or seal is missing.
Remove the Existing Faucet Without Creating Damage
- Photograph hot and cold routing, spray connections, and mounting hardware.
- Close both fixture stops, open the faucet, and verify that flow ceases.
- Place a bucket below the stops and disconnect supplies while supporting each valve body.
- Release the spray hose using its design-specific clip or collar.
- Loosen mounting nuts with a basin wrench; use penetrating products only when safe for surrounding materials.
- Lift the faucet vertically rather than prying against the sink or quartz edge.
A seized nut can twist a thin stainless deck, crack a brittle sink, or damage the countertop. Cut or split old hardware only with material protection and sufficient access. When corrosion extends into the shutoff, copper, or threaded nipple, let a plumber take over rather than converting faucet replacement into an emergency pipe repair.
Prepare and Inspect the Mounting Deck
Remove old putty, sealant, scale, and debris using a nonmetallic scraper and a cleaner approved for the surface. Do not enlarge a quartz, granite, fireclay, cast-iron, composite, or porcelain opening without the relevant fabricator or manufacturer approving the method. Dry the deck completely.
Inspect for cracks radiating from holes, rust, delamination, swelling cabinet material, mold, loose sink clips, and water tracks. Check whether the deck is flat enough for the new gasket. Concealing damage beneath a larger escutcheon postpones the failure; it does not repair it.
Dry-fit the faucet and optional plate. Mark handle sweep, spout center, dispenser position, and the hose path below. Verify that mounting hardware can be reached after the faucet is oriented. If the deck plate uses a gasket, do not add plumber’s putty unless the manual specifically calls for it and confirms material compatibility.
Mount the Faucet and Route Moving Parts
Feed lines and shank through the selected hole without scraping finishes or twisting integrated supplies. From below, install washers, support plates, and nuts in the published order. Have a helper hold alignment above while mounting hardware is tightened evenly. Excess force can distort a metal sink, crack a surface, or squeeze a gasket out of position.
Connect the pull-down hose until its quick-connect indicator, clip, or positive stop matches the manual. Install the weight at the marked location and extend the spray head several times. The hose must move freely without touching the disposal, trap, valves, filter housings, cabinet edge, or stored products.
A side sprayer needs its own sink opening, guide, hose route, and connection. Confirm that the spray hose cannot loop around the pull-down weight. Do not substitute a side-spray fitting from a different faucet family merely because it appears to click into place.
Connect Supplies and Optional Touchless Power
Join hot to hot and cold to cold. Start every connection by hand and keep lines aligned. A compression connection seals at its ferrule or gasket, not by covering threads indiscriminately with tape. Hold the shutoff body with a second wrench when appropriate so tightening does not rotate piping inside the wall.
Supply lines should form relaxed curves without kinks, abrasion, extension under tension, or contact with sharp metal. Integrated lines must not be cut or replaced unless the manufacturer provides a procedure. If a line is too short or the shutoff has the wrong connection, use an approved solution rather than stacking improvised adapters.
For touchless models, mount the solenoid, control box, battery holder, cables, and optional approved AC adapter exactly as shown. Keep electronic parts dry and above the cabinet floor where directed. Provide the sensor clearance and hose isolation described by the manufacturer. Do not use a generic power adapter near water.
Flush, Pressurize, and Perform a Leak Test
- Remove the aerator or spray head when the installation sheet instructs.
- Open each stop slowly while another person watches every joint.
- Flush cold and hot for the stated duration to remove installation debris.
- Reinstall the outlet parts in their original order.
- Operate the handle, spout, spray modes, side sprayer, and pull-down hose repeatedly.
- Dry connections, then place clean tissue around each supply and quick-connect.
- Fill and drain the sink while inspecting faucet, drain, disposal, and cabinet floor.
- Check again after hot-water use, several hours later, and the following day.
Distinguish splash from a pressurized leak. Dry the faucet base and deck, direct water away from them, then observe below. If moisture appears only when water is intentionally placed around the base, investigate gasket seating or deck sealing. If it appears while the surrounding deck stays dry, trace the supply, hose, or faucet body.
Troubleshooting by Symptom
| Symptom | First checks | Stop condition |
|---|---|---|
| Low flow after installation | Aerator debris, kinked hose, stop position, quick-connect seating | Pressure issue, damaged valve, or debris that repeatedly returns |
| Leak at supply joint | Shut off, inspect alignment, gasket or ferrule, and connection type | Cracked fitting, corroded stop, or stripped threads |
| Water at faucet base | Dry deck, gasket order, mounting alignment, splash test | Cracked sink, warped deck, or internal faucet leak |
| Spray head will not retract | Weight position, hose twist, cabinet collision | Damaged hose or incompatible routing |
| Touchless activation is erratic | Battery status, cable seating, sensor zone, handle position | Wet electronics, damaged cable, or unresolved diagnostic code |
Coordinate the next decision with the choose faucet height reach and hole pattern.
Frequently Asked Questions
Should old faucet supply lines be reused?
Follow the faucet and line manufacturers. Replace lines that are corroded, kinked, abraded, leaking, incorrectly sized, or beyond their documented service expectations. Integrated supplies are part of the faucet assembly.
Does every faucet need plumber’s putty?
No. Many models use a gasket or specified sealant. Putty can stain or damage some surfaces and may interfere with a designed gasket. Use only the method in the exact manual.
How tight should a mounting nut be?
Use the manufacturer’s procedure and tool guidance. The faucet should remain aligned and stable without distorting the sink, crushing a gasket, or stressing the countertop.
Can a touchless faucet share the disposal outlet?
Follow electrical code, faucet instructions, and receptacle configuration. A switched disposal outlet may remove faucet power unexpectedly; an approved battery setup may be preferable.
When is a plumber required?
Call for failed shutoffs, corroded or moving pipes, rough-in changes, concealed leaks, code-regulated work, damaged drainage, inaccessible connections, or any installation that cannot pass a controlled leak test.
Installation Is Complete Only After Reinspection
Store the model number, finish suffix, receipt, parts diagram, aerator key, and photographs of concealed connections together. Keep the cabinet lightly loaded until the next-day inspection. A faucet that looks straight above but leaves a slow drip below is not finished; the final deliverable is correct operation, unrestricted hose movement, serviceable shutoffs, and a dry cabinet.
Sources
- Delta Faucet official product page
- Delta Faucet specification or instruction document
- Moen faucet installation guidance
- Kohler support guidance