Key takeaways
- Do not use vinegar, lemon juice or ketchup as a routine cleaner. These acidic remedies may brighten brass, but they can etch, streak or remove patina unevenly.
- Skip steel wool, scouring powder and abrasive sponges. Even fine abrasives can leave permanent hairline scratches.
- Do not soak hardware overnight. Water can collect in threads, seams and mounting holes, while mixed-metal components may react differently.
- Never polish only the most visible spot. A bright circle surrounded by dark brass usually looks more damaged than the original patina.
- Do not spray cleaner directly on a cabinet knob. Overspray can stain wood, painted surfaces, stone and drawer interiors.
- Avoid wax or clear coat unless you want a maintenance change. These products can alter the color and may be difficult to remove evenly later.
Unlacquered brass cabinet hardware is meant to change over time. Unlike lacquered brass, it has no clear protective coating, so fingerprints, moisture, cooking residue and oxygen can gradually darken the surface or create a soft patina. That aging is not necessarily damage. The goal is to remove grime without stripping away the brass or polishing it to an unnaturally bright, uneven finish.
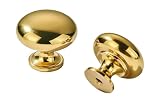
Cleaning goes wrong when a harsh product or rough tool removes too much metal, leaves scratches or creates bright spots around frequently touched areas. Acidic cleaners, including vinegar and lemon juice, can also etch or discolor brass if they remain on the surface too long. This method uses mild soap, limited moisture and gentle drying to clean unlacquered brass cabinet hardware safely. It works for knobs such as the khtumeware Unlacquered Brass Classic Knobs, which are sold in a five-pack for about $32.99, as well as solid-brass round knobs priced around $24.99 per five-pack.
As an Amazon Associate we earn from qualifying purchases at no extra cost to you. Product prices and availability are accurate as of the date shown and are subject to change.

What You Need
| Item | Why | Optional? |
|---|---|---|
| Warm water | Loosens fingerprints, dust and water-soluble residue without aggressively reacting with brass. | No |
| Mild, pH-neutral dish soap | Breaks down kitchen grease. Use about 1 teaspoon per 2 cups of water. | No |
| Two or three soft microfiber cloths | One cleans, one rinses and one dries. Microfiber is less likely to leave lint than paper towels. | No |
| Soft-bristled toothbrush | Reaches threads, edges and the joint between a knob and its mounting base. | Optional |
| Small bowl or basin | Holds diluted soapy water and prevents soaking the cabinet door. | Optional |
| Nitrile gloves | Keep skin oils off freshly cleaned brass and protect hands from grime. | Optional |
| Painter’s tape and a phone camera | Help label hardware and document its original patina before removal. | Optional |
Step-by-Step
1. Identify the finish and photograph it — 5 minutes
Confirm that the hardware is unlacquered brass. Aged brass that develops fingerprints, darkens or changes color over time is usually unlacquered. If the surface has a uniform glossy clear layer, it may be lacquered, and this process should be adjusted because a cloudy or damaged coating may need professional refinishing.
Look for a manufacturer’s care instructions, especially on newer hardware. Take a quick photo of each knob before cleaning so you can preserve the original level of patina. Decide whether you want a naturally aged appearance or a brighter finish. Cleaning should not automatically mean polishing.
2. Remove the hardware when practical — 5 to 15 minutes
Use the correct screwdriver and place each screw in a small container. Removing knobs allows you to clean the backs and mounting areas without getting water on the cabinet. Label hardware by door or drawer if the pieces have different wear patterns or if you want to return each one to its original location.
If the screws are stuck, do not force the knob with pliers. Protect the brass with a folded cloth and work slowly. For hardware that cannot be removed, place a towel beneath it and use a barely damp cloth so water does not run into the cabinet or drawer front.
3. Dust the surface first — 1 to 2 minutes
Wipe each knob with a dry microfiber cloth. Removing grit before adding moisture reduces the chance of dragging tiny particles across the brass. Use a soft toothbrush around screw holes, knurling, seams and the underside of a round knob. Do not use a dry abrasive pad, melamine sponge or stiff brush.
4. Mix a mild cleaning solution — 1 minute
Combine approximately 2 cups of warm, not hot, water with 1 teaspoon of mild dish soap. Stir gently rather than creating a bowl full of foam. Avoid cleaners labeled polishing, descaling, disinfecting or heavy-duty degreasing unless the manufacturer specifically approves them for unlacquered brass.
5. Test an inconspicuous area — 5 minutes
Dampen a corner of the microfiber cloth and test the underside or back of one knob. Wipe lightly for about 15 seconds, then rinse the area with a separate cloth dampened with plain water. Dry immediately and wait several minutes. Stop if the brass becomes streaky, unusually bright, cloudy or noticeably different from the surrounding finish.
6. Clean one section at a time — 5 to 10 minutes per knob
Wring the cleaning cloth until it is damp, not dripping. Wipe the knob with light pressure, following its shape rather than scrubbing in circles. Pay extra attention to areas touched most often, but do not try to remove every dark mark. A consistent patina is often preferable to a patchy, mirror-bright spot.
For buildup around the mounting base, use the soft toothbrush dipped in the solution. Keep the brush nearly dry and work in short strokes. Never immerse a knob with an attached screw or threaded insert unless the manufacturer says it is safe; trapped water can contribute to corrosion on other metals.
7. Rinse away soap — 1 to 2 minutes per knob
Soap residue can leave a dull film, so wipe the surface with a second microfiber cloth dampened with clean water. Use as little water as possible and change the rinse water when it becomes cloudy. On cabinet-mounted hardware, protect the wood or painted finish from drips.
8. Dry completely and reinstall — 2 to 5 minutes per knob
Immediately buff the brass dry with a clean microfiber cloth, including the underside, screw holes and threads. Let removed hardware air-dry for another 10 to 15 minutes before reinstalling it. Do not use a hair dryer or heat gun; concentrated heat can affect nearby finishes and is unnecessary.
Reattach each knob snugly but do not overtighten. Excessive force can distort a mounting screw, damage a drawer front or make future removal difficult. After installation, handle the hardware with clean, dry hands.
Mistakes to Avoid
- Do not use vinegar, lemon juice or ketchup as a routine cleaner. These acidic remedies may brighten brass, but they can etch, streak or remove patina unevenly.
- Skip steel wool, scouring powder and abrasive sponges. Even fine abrasives can leave permanent hairline scratches.
- Do not soak hardware overnight. Water can collect in threads, seams and mounting holes, while mixed-metal components may react differently.
- Never polish only the most visible spot. A bright circle surrounded by dark brass usually looks more damaged than the original patina.
- Do not spray cleaner directly on a cabinet knob. Overspray can stain wood, painted surfaces, stone and drawer interiors.
- Avoid wax or clear coat unless you want a maintenance change. These products can alter the color and may be difficult to remove evenly later.
How Often
Dust or dry-wipe brass hardware weekly or whenever you clean the cabinet fronts. Use the mild soap method every one to three months in a kitchen, depending on grease and handling. Bathroom hardware may need monthly cleaning because of water spots and humidity. In a low-use room, a gentle wash two or three times a year may be sufficient.
Clean spills promptly, especially salty, acidic or oily foods. After washing cabinets, dry the knobs rather than allowing moisture to evaporate on the brass. Frequent gentle cleaning is safer than waiting until thick residue requires aggressive scrubbing.
When to Call a Pro or Replace
Consult a metal-restoration professional if the hardware has deep scratches, peeling lacquer, green corrosion, severe pitting or large areas of uneven chemical discoloration. Green deposits can indicate corrosion around a joint or mixed-metal component; avoid scraping them aggressively. A professional can determine whether the piece is solid brass, plated brass or another alloy before refinishing it.
Replacement is reasonable when a knob is cracked, stripped, badly pitted or structurally loose. For a coordinated update, measure the existing knob diameter and screw length before ordering. Common round cabinet knobs are about 1 to 1 1/4 inches in diameter, but the mounting screw length must also suit the cabinet or drawer thickness.
FAQ
Can I make unlacquered brass bright again?
Yes, but brightening requires a brass polish or an acidic treatment, both of which remove or alter patina. Test first and polish the entire matching set rather than one knob. If you want the brass to age naturally again, do not apply lacquer or wax without understanding the long-term maintenance.
How can I tell whether brass is solid or plated?
Check the product description, packaging or manufacturer’s specifications. A magnet test can offer a clue: solid brass is nonmagnetic, while a magnetic response may indicate steel beneath a brass coating. However, some hardware uses mixed metals, so the test is not definitive. Never sand through the surface to investigate.
Is baking soda safe for cabinet hardware?
It is better avoided for routine cleaning. Baking soda is mildly abrasive, and rubbing it into unlacquered brass can create fine scratches or unevenly remove patina. Mild soap and water are a safer first choice.
Why did my brass turn darker after cleaning?
Unlacquered brass naturally reacts with air, moisture and skin oils, so darkening can occur even after a careful wash. Remaining soap, incomplete drying or a reaction with an acidic cleaner can intensify the change. Rinse thoroughly, dry immediately and compare the hardware again after it has rested for 24 hours.