Key takeaways
- Using a wood screw in a machine-screw handle: A wood screw may damage the handle’s threads and will not provide the correct engagement.
- Choosing a screw by length alone: Check diameter, thread type, head shape, and the thickness of the cabinet front.
- Skipping the pilot hole: A pilot hole reduces wedging pressure and helps keep the screw centered in crumbly material.
- Overtightening: Stop as soon as the handle is secure. Stripping often happens during the final turn.
- Using too much glue: Excess adhesive can swell particle board, stain a laminate edge, or prevent a screw from seating.
- Drilling all the way through: Measure the panel and mark the drill bit with tape so it cannot pass through the visible face.
- Ignoring a swollen cabinet edge: Water damage can leave the material too weak for a conventional screw repair.
Loose cabinet handle screws are more than a minor annoyance. Every pull adds leverage to the screw, and particle board can crumble when a fastener is overtightened or driven into an existing damaged hole. A quick fix with a screw that is too large, too short, or poorly aligned may hold for a few days, then leave a wider hole, a cracked surface, or a handle that spins again.
The reliable approach is to first identify the hardware: wood screws bite directly into the cabinet material, while machine screws pass through the door or drawer front and thread into the handle. The repair below covers both types and is suitable for many laminate, MDF, and particle-board cabinets. Set aside about 20 to 30 minutes for one handle, including adhesive curing time. The method is current for typical home repairs in 2026.
As an Amazon Associate we earn from qualifying purchases at no extra cost to you. Product prices and availability are accurate as of the date shown and are subject to change.

What You Need
| Item | Why | Optional? |
|---|---|---|
| Phillips or square-drive screwdriver | Removes and tightens the existing screw without damaging the head | No |
| Replacement screws | Matches the fastener to the cabinet material and handle | No, if the original screw is stripped or too short |
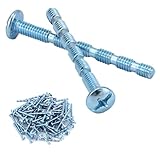
| FASTENPOWER #8 x 1-1/4-inch particle-board screws | Suitable for many wood-screw applications in MDF, particle board, and cabinet parts; listed price is about $9.99 for 100 | Yes |
| QWORK #8-32, 1-3/4-inch break-away machine screws | Useful for handles and knobs that use threaded machine-screw holes; listed price is about $9.47 for 100 | Yes |
| Wood glue or two-part epoxy | Stabilizes a damaged hole before a new wood screw is installed | Yes |
| Wooden toothpicks or hardwood dowel | Fills a stripped wood-screw hole so the screw has fresh material to grip | Yes |
| Drill and small drill bits | Makes a centered pilot hole and prevents the particle board from splitting or swelling | Yes, but helpful |
| Ruler or tape measure | Checks screw length, handle-hole spacing, and how far a screw can safely extend | Yes |
| Painter’s tape and a rag | Protects the finish and catches debris during drilling | Yes |
Before buying hardware, remove one screw and measure it. A 1-1/4-inch wood screw may work on a thick cabinet frame, but it can punch through a thin drawer front. For a machine screw, measure the distance from the screw head to the handle; it should pass through the front and engage most of the handle’s threaded depth without bottoming out.
Step-by-Step
1. Identify the screw type and inspect the damage — 3 minutes
Open the door or drawer and look at the back of the handle. If the screw threads directly into particle board, it is a wood-screw installation. If a long screw passes through the door and threads into the handle or knob, it is a machine-screw installation, commonly #8-32.
Remove the loose screw by turning it counterclockwise. Examine the threads and the hole. If the screw is intact and the hole is clean, the problem may simply be under-tightening. If the screw turns without becoming tight, the hole is stripped. If the particle board is swollen, missing, or cracked, a filler repair may not be strong enough.
2. Remove the handle and protect the cabinet — 2 minutes
Hold the handle from the front while loosening the screw from the back. This prevents the handle from spinning and scraping the finish. Place a rag under the work area, and apply painter’s tape around a damaged hole or drilling location if the cabinet has a delicate laminate surface.
Do not keep turning a stripped screw with a power drill. Excessive friction can enlarge the hole and generate heat that damages laminate or softens an edge band.
3. Test-fit the original hardware — 2 minutes
Try the original screw in the handle away from the cabinet. For a wood screw, confirm that the threads are sharp and that the head sits flat in the handle. For a machine screw, thread it into the handle by hand for at least four or five full turns. It should turn smoothly; resistance at the beginning can indicate cross-threading.
If the screw is too short to engage securely, replace it. If it extends more than about 1/8 inch beyond the back of a door or drawer front, choose a shorter screw. A protruding fastener can catch clothing, scratch adjacent surfaces, or interfere with drawer operation.
4. Repair a stripped wood-screw hole — 5 to 10 minutes, plus curing time
For a small, cleanly stripped hole, apply a modest amount of wood glue to two or three wooden toothpicks. Push them into the hole, trim them flush with a utility knife, and wipe away excess glue. Let the glue cure according to its label; many products need several hours before the repair can take a load.
For a larger hole, use a snug hardwood dowel rather than packing it loosely with toothpicks. Cut the dowel to the hole’s depth, coat it with glue, press it in, and let it cure fully. Do not rely on glue alone to hold the handle. The replacement screw must bite into the repaired wood.
Once cured, drill a pilot hole through the center of the filler. For a typical #8 wood screw, use a pilot bit approximately 1/8 to 5/32 inch in diameter, depending on the density of the board and the screw’s core diameter. The pilot hole should be slightly shorter than the screw, not deeper than the cabinet panel.
5. Replace or reinstall the screw — 3 minutes
Position the handle and start the screw by hand. For a wood screw, drive it straight into the pilot hole until the head is snug against the handle. For a machine screw, insert it through the cabinet front and turn it into the handle by hand before using a screwdriver.
Tighten until the handle no longer shifts, then stop. Particle board does not become stronger when a screw is forced tighter. If using a drill, select the lowest clutch setting and finish with a hand screwdriver. Avoid impact drivers for this repair.
6. Check alignment and function — 3 minutes
Pull the handle several times with normal force. It should remain centered and should not rock, rotate, or produce a clicking sound. Open and close the door or drawer to ensure the screw head is not interfering with hinges, drawer slides, or neighboring cabinet parts.
After 24 hours, check the handle again. If it has loosened, stop tightening and reassess the hole, screw type, and handle threads. Repeated tightening cannot compensate for a badly damaged substrate.
Mistakes to Avoid
- Using a wood screw in a machine-screw handle: A wood screw may damage the handle’s threads and will not provide the correct engagement.
- Choosing a screw by length alone: Check diameter, thread type, head shape, and the thickness of the cabinet front.
- Skipping the pilot hole: A pilot hole reduces wedging pressure and helps keep the screw centered in crumbly material.
- Overtightening: Stop as soon as the handle is secure. Stripping often happens during the final turn.
- Using too much glue: Excess adhesive can swell particle board, stain a laminate edge, or prevent a screw from seating.
- Drilling all the way through: Measure the panel and mark the drill bit with tape so it cannot pass through the visible face.
- Ignoring a swollen cabinet edge: Water damage can leave the material too weak for a conventional screw repair.
How Often
Inspect frequently used handles every six months and check vacation-home or guest-room hardware once a year. A quick hand check is enough: gently try to move each handle without forcing it. Tighten a slightly loose screw immediately, before movement enlarges the hole.
Handles on heavy drawers, pantry doors, and appliance garages deserve extra attention because they receive more pulling force. Avoid hanging bags, towels, or other objects from cabinet handles; that added weight can loosen hardware much faster than ordinary use.
When to Call a Pro or Replace
Call a cabinet professional if the particle board is swollen across a broad area, the laminate is lifting, the mounting area is cracked, or a handle must support unusual force. A professional may install a through-bolt, threaded insert, backing plate, or replacement drawer front. These solutions are more dependable than repeatedly filling the same hole.
Replace the handle if its internal threads are stripped, the mounting post is cracked, or the screw cannot engage at least four full machine-screw turns. Replace the cabinet component if the repair area has crumbled into powder or if the panel is visibly bowing. Hardware is inexpensive, but a failing drawer front can become a safety issue if it separates while loaded.
FAQ
Can I use a longer screw to fix a loose cabinet handle?
Only if the longer screw will not pass through the cabinet front or interfere with the drawer interior. Measure the panel thickness and the handle’s threaded depth first. Leave no more than about 1/8 inch of a wood screw beyond the material, and confirm that a machine screw does not bottom out inside the handle.
Is wood glue enough to hold a loose handle?
No. Glue can stabilize a stripped hole, but it is not a replacement for proper mechanical threads. Fill the hole, allow the adhesive to cure, drill a centered pilot hole, and reinstall a correctly sized screw.
What is the difference between #8 wood screws and #8-32 machine screws?
A #8 wood screw has a tapered, aggressive thread designed to grip wood-based material. A #8-32 machine screw has a uniform thread with 32 threads per inch and is intended to thread into a matching metal or molded insert. They are not interchangeable.
Why does my handle keep coming loose after repair?
The hole may be too damaged, the screw may be the wrong type or length, or the handle’s threads may be worn. It can also indicate a cracked or water-damaged panel. If a correctly installed screw loosens again after one repair, stop retightening and use a backing plate, threaded insert, through-bolt, or replacement part.